- /
- /
- /
Edit a 3D Community
By Aaron Dishno Ed.D.
After you have Created your New 3D Community, Set the Scene, Added Landscape, and Added a 3D Building to your 3D Community, it is time to use the 3D Building Blocks or Shapes to complete your 3D Community.
Load your 3D Community if you haven’t already, (here is a reminder)…
Admin -> My 3D Communities -> Select 3D Community
Select Demo 3D Community (or whatever you called it).
Edit a 3D Community
In the same way as constructing a 3D Building, you can add various 3D Objects:
- Add 3D Building Blocks – Used to add streets, sidewalks, curbs, stairs, paths, and any other 3D Shapes to be part of the Scene.
- Add 3D Web Objects – Used to add billboards, images, links, and other traditional Web functionality adapted for 3D.
- Add 3D Things – Used to add street signs, trees, bushes, park benches, bridges, and other assemblies of 3D Building Blocks.
- Add or Edit Actions – Used to add swinging gates, sliding doors, draw bridges, and other animated 3D Building Blocks.
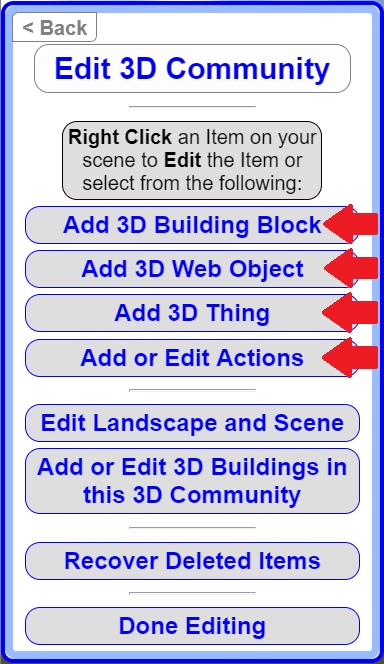
Click Add 3D Building Block
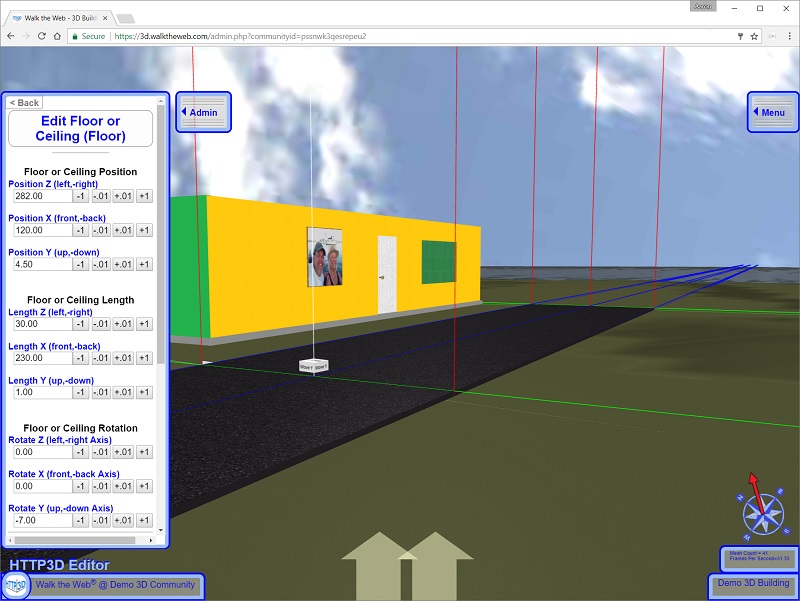
Click Add Floor
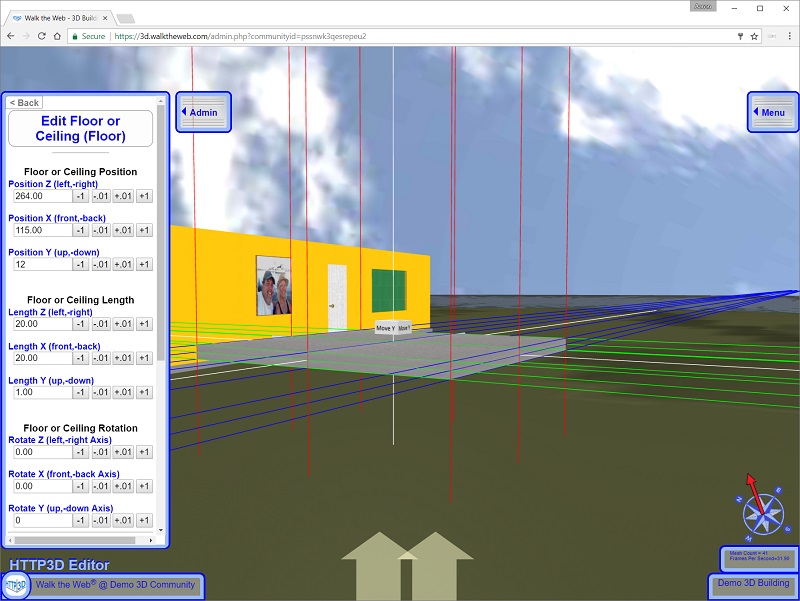
Use the following Settings:
- Position: Z = 282.00 X = 120.00 Y = 4.50
- Length: Z = 30.00 X = 230.00 Y = 1.00
- Rotation: Z = 0.00 X = 0.00 Y = -7.00
- Floor Texture Image: asphalt.jpg from Stock Images
Then click Save Floor.
Just like adding 3D Objects to a 3D Building you can add the same items on the 3D Community level (see 3D Building Blocks, 3D Web Objects, and 3D Things tutorials).
When you have a completed 3D Object, you can always Share it!