- /
- /
- /
Add 3D Buildings to a 3D Community
By Aaron Dishno Ed.D.
After you Set the Scene and Landscape for your 3D Community, it is time to add 3D Buildings!
For this demo, we are going to use the water scene with an island from the previous Tutorial.
Load your 3D Community if you haven’t already, (here is a reminder)…
Admin -> My 3D Communities -> Select 3D Community
Select Demo 3D Community (or whatever you called it).
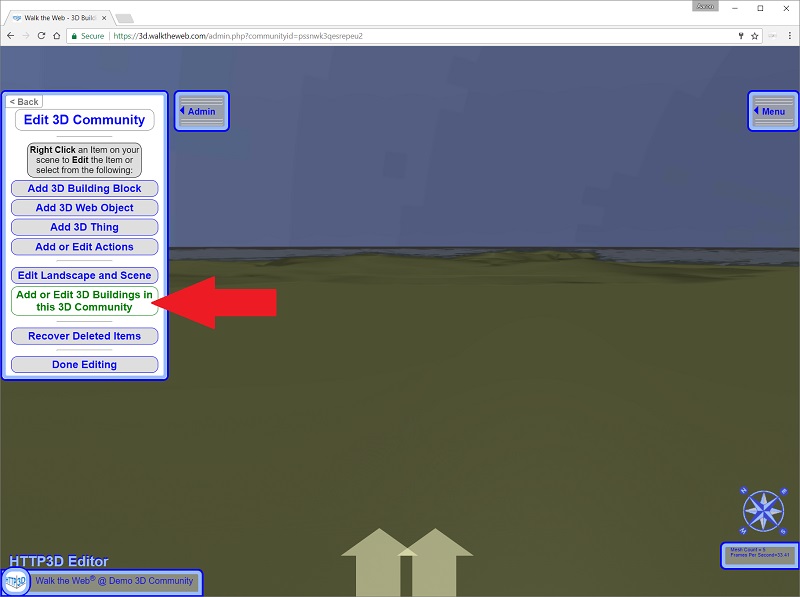
Add a 3D Building
The first step is to pick a location for your 3D Building.
Walk to the desired location and navigate the menu to:
Admin -> My 3D Communities -> Edit 3D Community
then click Add or Edit 3D Buildings in this 3D Community.
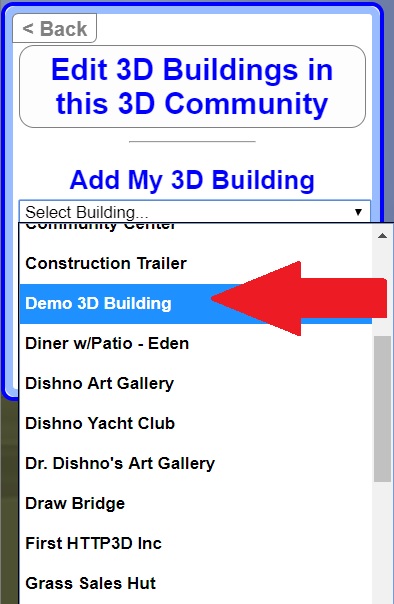
Select your 3D Building from the drop-down menu
When you click your 3D Building, you will see the Edit 3D Building Location settings in the Editor window and your 3D Building will appear in front of you.
If the 3D Building doesn’t appear automatically, try Walking forward or backwards to trigger the Load Zone.
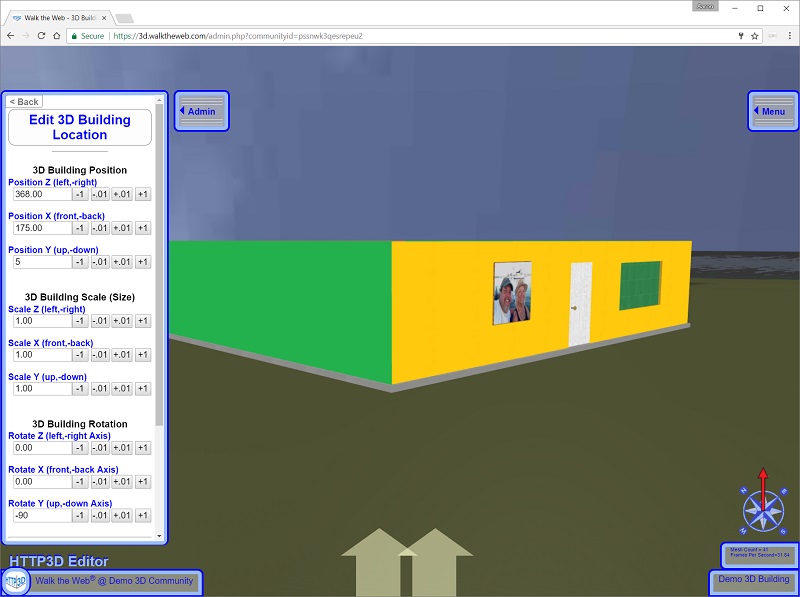
Position your 3D Building at the location you desire and use Rotate Y to make it face the right direction.
Click Save 3D Building.
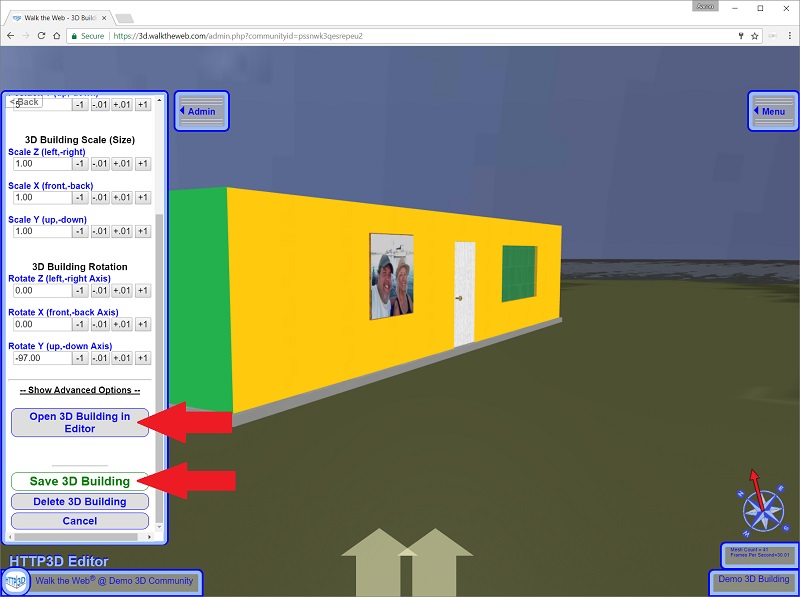
If you need to change something in your 3D Building, I provided a quick link to Open 3D Building in Editor.
Next, we will Edit your 3D Community.