- /
- /
- /
Create a 3D Thing – 3D Building Blocks
By Aaron Dishno Ed.D.
After you have Created your New 3D Thing and understand a basic Common Scale for 3D Objects, it is time to use the 3D Building Blocks or Shapes to build an object.
3D Building Blocks are 3D Shapes
Load your new 3D Thing if you haven’t already.
If you are new to 3D Building Blocks, you might want to start with this tutorial.
Editing 3D Things Camera View
Before we build, the first thing you may have noticed is that the scene moves differently with the mouse or keyboard.
By default, 3D Buildings and 3D Communities use a Free Movement Camera, and Editing 3D Things uses an Arc Camera (rotate Camera). Instead of turning Left or Right, the Camera rotates around the center of the 3D Thing; and instead of Walking, you can move closer or farther to the 3D Thing.
Let’s Build a 3D Thing!
Navigate in the Admin Menu:
Admin -> My 3D Things -> Edit 3D Thing -> Add 3D Buiding Block
Select Add Cone
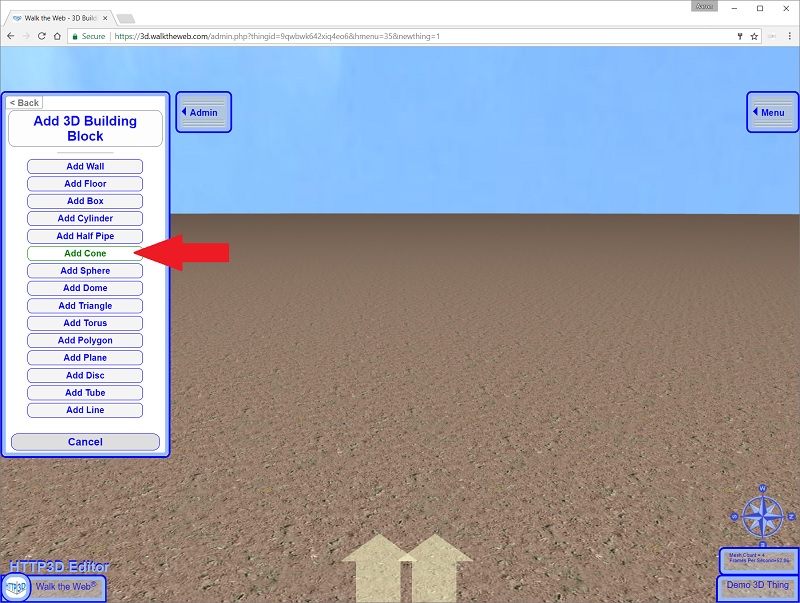
All 3D Building Blocks that you add to the 3D Thing will start at position Z=0 and X=0.
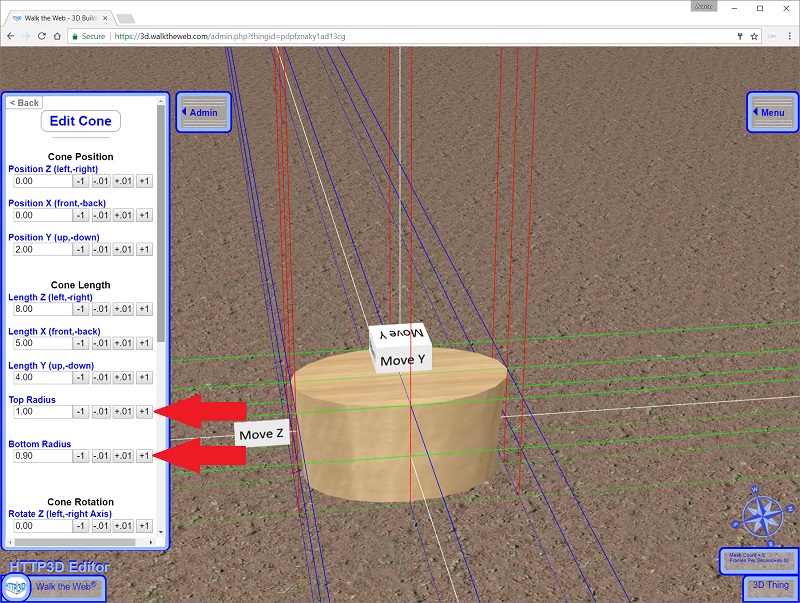
Use the following settings for the Cone:
- Position: Z = 0.00 X = 0.00 Y = 2.00
- Length: Z = 8.00 X = 5.00 Y = 4.00
- Top Radius: 1.00
- Bottom Radius: 0.90
- Rotation: Z = 0.00 X = 0.00 Y = 0.00
- Cone Texture Image: yellowwood.png from Stock Images
Note that the Top Radius and Bottom Radius are Ratios. In this case, the Bottom is .90 or 90% the size of the top. The Length Z, X and Y ultimately set the size.
Click Save Cone.
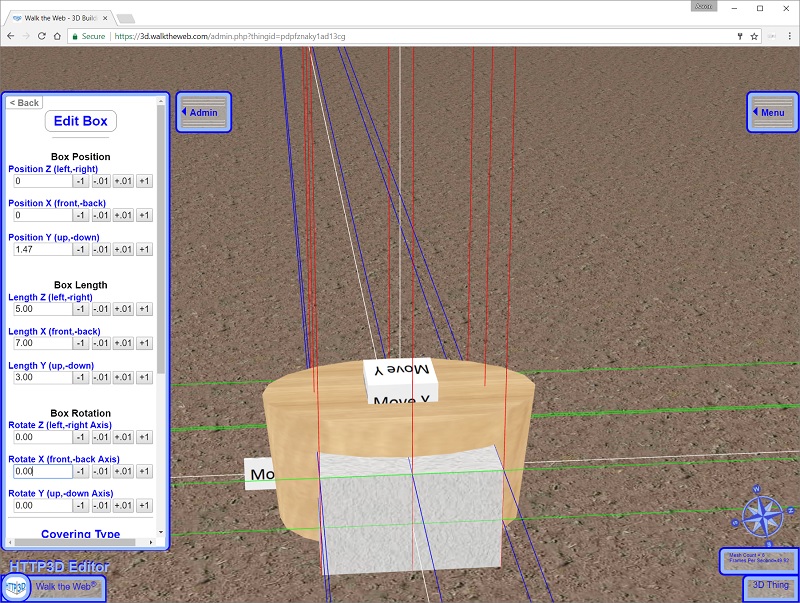
Next, Add a Box with the following Settings:
- Position: Z = 0.00 X = 0.00 Y = 1.47
- Length: Z = 5.00 X = 7.00 Y = 3.00
- Rotation: Z = 0.00 X = 0.00 Y = 0.00
- Box Texture Image: stucco.jpg from Stock Images (default)
Click Save Box.
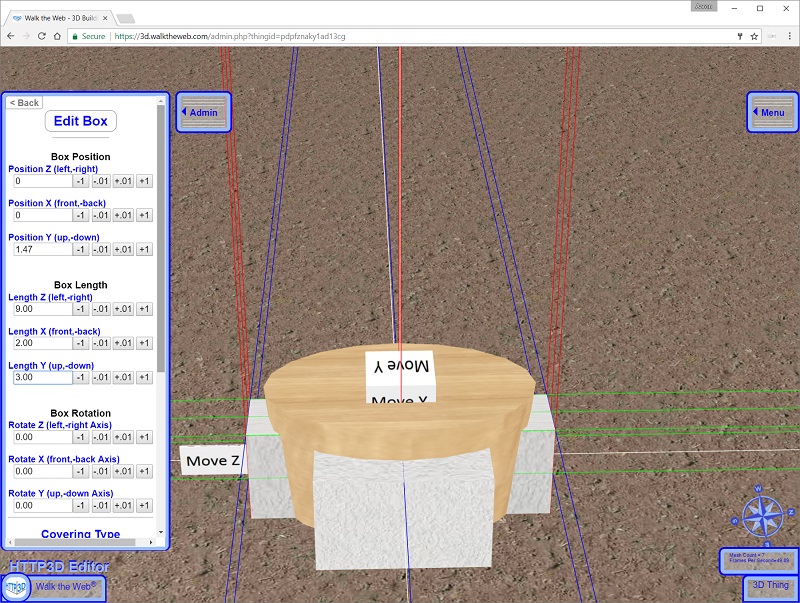
Next, Add another Box with the following Settings:
- Position: Z = 0.00 X = 0.00 Y = 1.47
- Length: Z = 9.00 X = 2.00 Y = 3.00
- Rotation: Z = 0.00 X = 0.00 Y = 0.00
- Box Texture Image: stucco.jpg from Stock Images (default)
Click Save Box.
Next, Add a Cylinder with the following Settings:
- Position: Z = 0.00 X = 0.00 Y = 4.00
- Length: Z = 9.00 X = 6.00 Y = 0.25
- Rotation: Z = 0.00 X = 0.00 Y = 0.00
- Cylinder Texture Image: red oak.jpg from Stock Images (default)
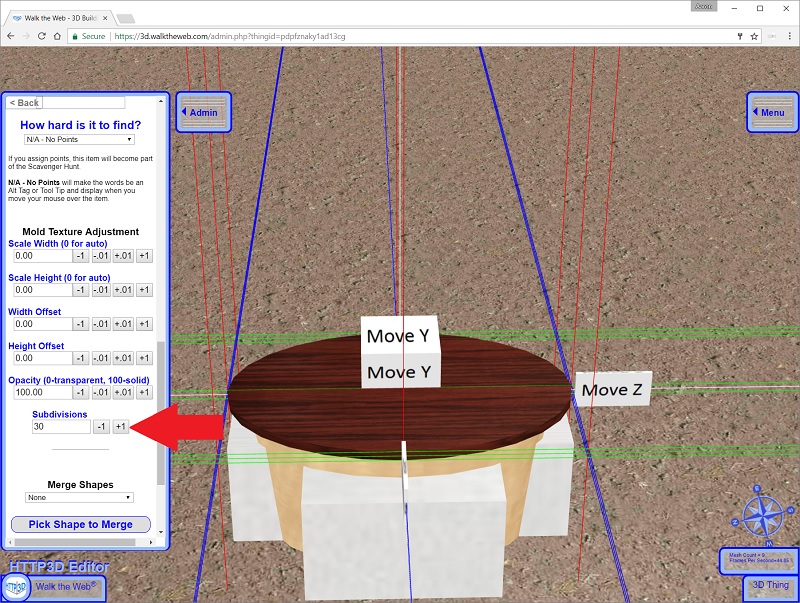
Click Show Advanced Options and set:
- Subdivisions: 30.00
Subdivisions help determine the number of planes (triangles) used to make the Sphere.
The more subdivisions, the smoother the sphere.
The less subdivisions, the faster it can render in the scene.
Click Save Cylinder.
Next, for the unveiling…
Right-Click the first Box to Edit it.
In Advanced Options go to the Merge Shapes section.
Select Subtract from another Shape.
Click Pick Shape to Merge and then Left-Click the Cone (Yellow Wood part).
Click Save Box.
Right-Click the second Box to Edit it.
In Advanced Options go to the Merge Shapes section.
Select Subtract from another Shape.
Click Pick Shape to Merge and then Left-Click the Cone (Yellow Wood part).
Click Save Box.
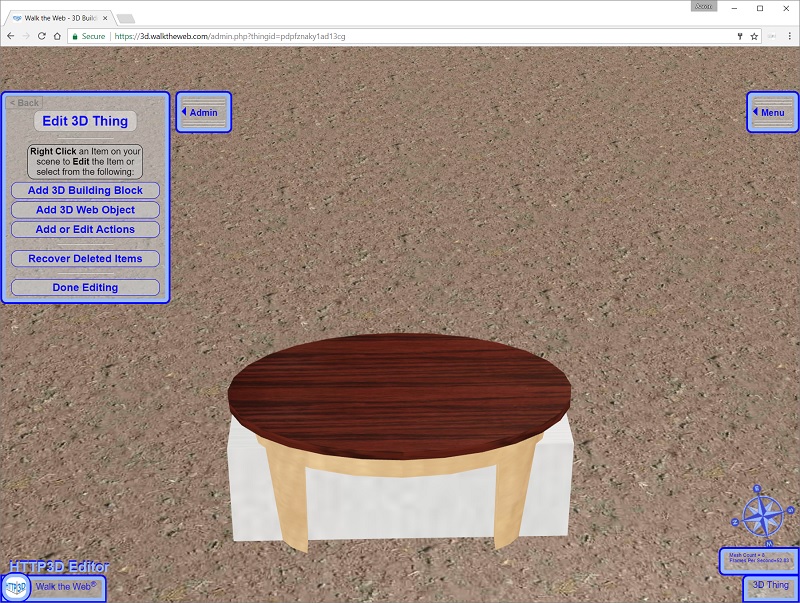
You may need to refresh your screen.
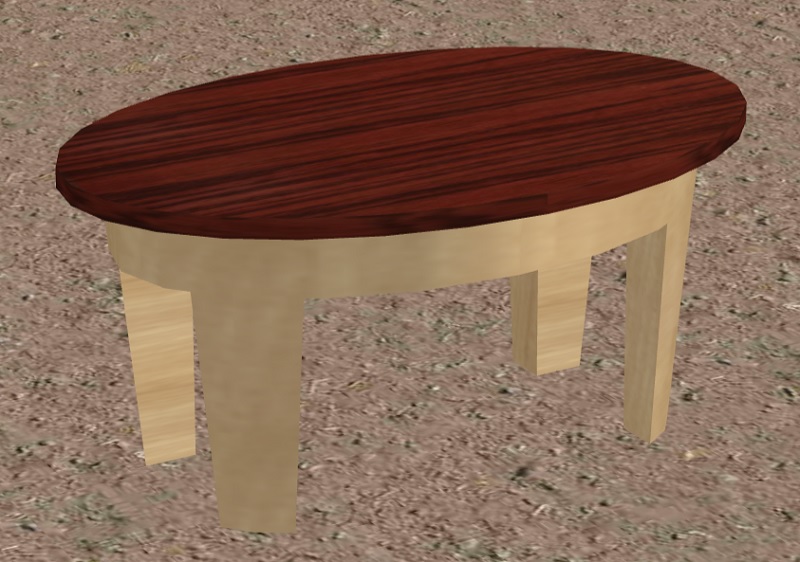
But here is the final product.
You can rename the 3D Thing at the following Admin Menu option:
Admin -> My 3D Things -> Edit 3D Thing -> Settings and Tools -> 3D Thing Information
I suggest calling it Coffee Table.
Then click Save Settings.
Next I will show you how to add your 3D Thing to a 3D Building.