- /
- /
- /
Swinging Doors – Action Zones
By Aaron Dishno Ed.D.
In the last tutorial we learned how to create a Sliding Door Action Zone. Now it is time to add a Swinging Door.
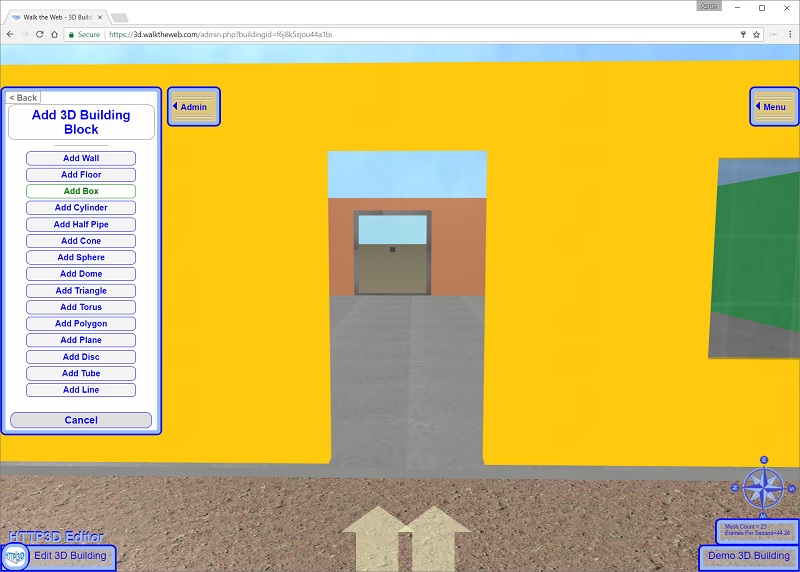
Using the 3D Building Demo from the Tutorial, we will now add a swinging door.
If you aren’t coming from the Tutorial, you will need to first cut the opening in the Wall. See the detailed steps and screen shots in the Merge Shapes Tutorial.
Create the Door
Creating the Door is just like creating anything else. Basically you build a door in the closed position.
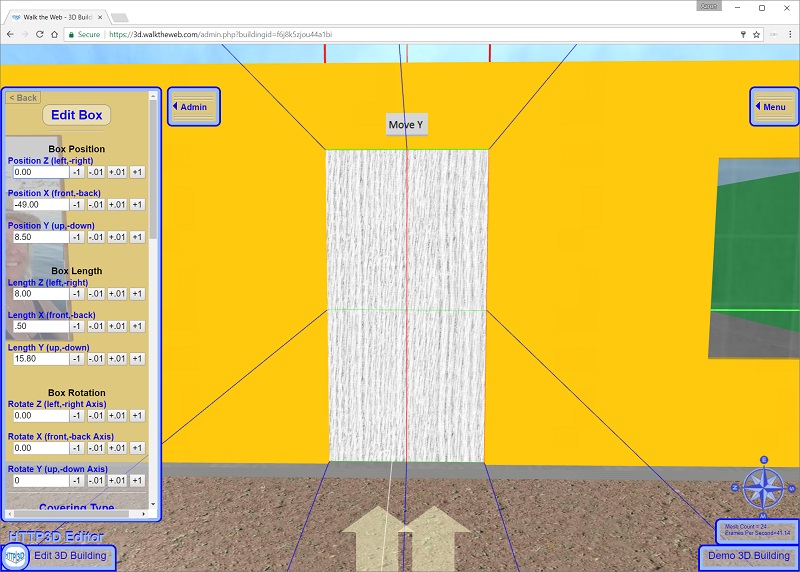
Create the Door as a Box:
Admin -> My 3D Buildings -> Edit 3D Building -> Add 3D Building Block -> Add Box
with the following dimensions:
- Position: Z = 4.00 X = -49.00 Y = 8.50
- Length: Z = 8.00 X = 0.50 Y = 15.80
- Rotation: Z = 0.00 X = 0.00 Y = 0.00
You can also change the Texture Image. (I chose whitewoodgrainside.jpg from the Stock Images)
Click Save Box.
It should look something like this…
Working with small 3D Objects, it is helpful to Hide Axis Labels
Admin -> Editor Settings -> Hide Axis Labels
You can also Turn Off Wall Collisions to easily Walk through the Walls.
Admin -> Editor Settings -> Turn Off Wall Collisions
Click here to learn about more helpful Editor Settings.
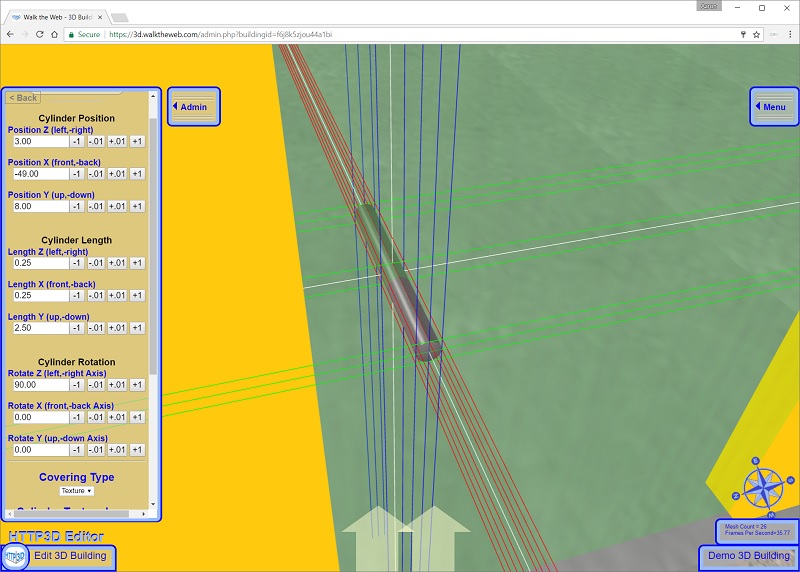
Create the post for the Door handles as a Cylinder:
Admin -> My 3D Buildings -> Edit 3D Building -> Add 3D Building Block -> Add Cylinder
with the following dimensions:
- Position: Z = 3.00 X = -49.00 Y = 8.00
- Length: Z = 0.25 X = 0.25 Y = 2.50
- Rotation: Z = 90.00 X = 0.00 Y = 0.00
You can also change the Texture Image. (I chose metal.jpg from the Stock Images)
Click Save Cylinder.
It should look something like this…
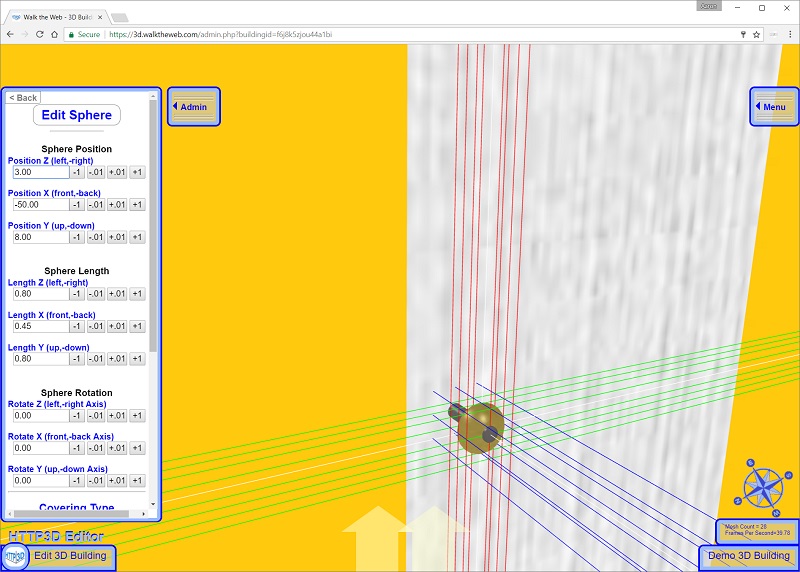
Create a Door handle as a Sphere:
Admin -> My 3D Buildings -> Edit 3D Building -> Add 3D Building Block -> Add Sphere
with the following dimensions:
- Position: Z = 3.00 X = -50.00 Y = 8.00
- Length: Z = 0.80 X = 0.45 Y = 0.80
- Rotation: Z = 0.00 X = 0.00 Y = 0.00
You can also change the Texture Image. (I chose brass.jpg from the Stock Images)
Click Save Sphere.
It should look something like this…
The easiest way to create the second door handle is to Edit the Door Handle, then scroll to the bottom and select Create a Duplicate Item.
A New Item like the first one will be created and open in the Editor. You will only need to set the Z and X Position. All of the other settings are copied form the original.
Set Position Z = 3.00 and Position X = -48.00
Click Save Sphere.
You now have a closed Door. It is time to Animate it with a Swinging Door Action Zone.
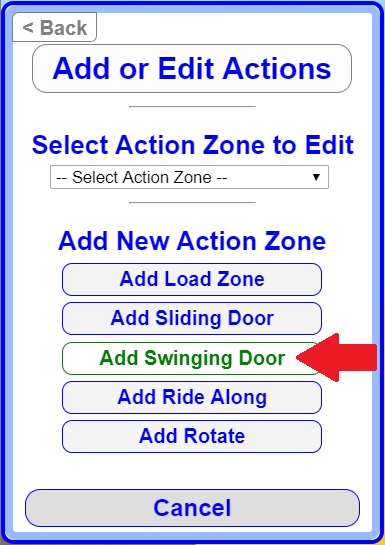
Add a Swinging Door Action Zone
When you are facing the Door, click the following Admin Menu Item:
Admin -> My 3D Buildings -> Edit 3D Building -> Add or Edit Actions
Click Add Swinging Door.
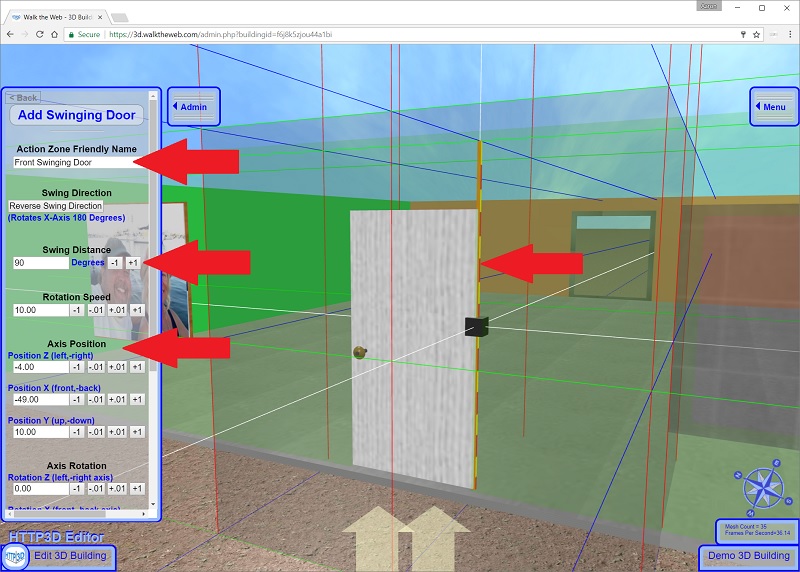
You will now see an Action Zone, a Red and Yellow Axis pole, and the Edit Window.
Give the Action Zone a Friendly Name like Front Swinging Door.
The Red and Yellow Pole is the Hinge Axis.
To test it, Walk into the Action Zone. The Pole will rotate (Watch the Black Box on the Pole).
To reverse the direction of the swinging door you can rotate the Axis Rotation X to 180.
You can also adjust the Swing Distance to set the movement distance (defaults to 90 degrees).
Move the Axis Pole to the edge of the door.
- Axis Position: Z = -4.00 X = -49.00 Y = 10.00
Click Show Advanced Options
Scroll down and click Show Advanced Options.
By default, when you move the Action Zone Axis Position, the Action Zone moves with it. This is useful for getting close to where you want it.
Now want the Action Zone to center on the door.
Uncheck the box for Use Axle Position for Action Zone, you can move the Zone separate from the Hinge Axis.
Now Move the Action Zone (not the pole) to center on the door and make it a bit larger.
- Position: Z = 0.00 X = -49.00 Y = 10.00
- Length: Z = 30.00 X = 40.00 Y = 20.00
This will give the door more room to Swing as we approach it.
Next we need to Attach the Door Parts to the Slider.
Attach the Door Parts to the Swinging Axis
To Add Door Parts, Scroll down near the bottom of the Edit Action Zone menu to the section called Action Zone Parts.
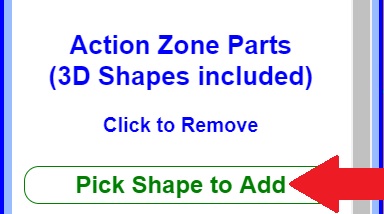
Click Pick Shape to Add, and select the Door.
Then click Pick Shape to Add, and select the Door Handle Axle.
Then click Pick Shape to Add, and select the Door Handle.
Then click Pick Shape to Add, and select the second Door Handle.
(Note: if you walk into the Action Zone, the parts already attached will open, making it easier to find the parts left to add).

Click Save Action Zone to complete the steps.
You now have a working Swinging Door.
Using this same Swinging Door Action Zone, you can create Draw Bridges, Garage Doors, Trap Doors, Ramps, Moving Maze Walls, swinging 3D Shapes, etc…
The Axis can rotate to any start position using the Axis Rotation Z and X
(Y Axis is the swing Axis and rotates when you enter the Action Zone).
Next, I will show you how to Create a 3D Thing.