- /
- /
- /
Merge (Cutting Out) 3D Shapes
By Aaron Dishno Ed.D.
When you Create a 3D Building – 3D Building Blocks you might notice that there is a limited number of 3D Shapes to work with so far. This article will expand that exponentially. This is an advanced topic.
Openings in Walls
Continuing to create our 3D Building, I am sure you noticed we do not have an opening to get inside. We could have created multiple parts of the wall to leave an opening. Notice that we could place three walls and leave an opening.

But you would have to create at least six Walls if you want a window next to a door.
The same door opening can be accomplished by creating one solid wall and cutting out a door. This method would only need two 3D Shapes (the Wall and the Cut Out).
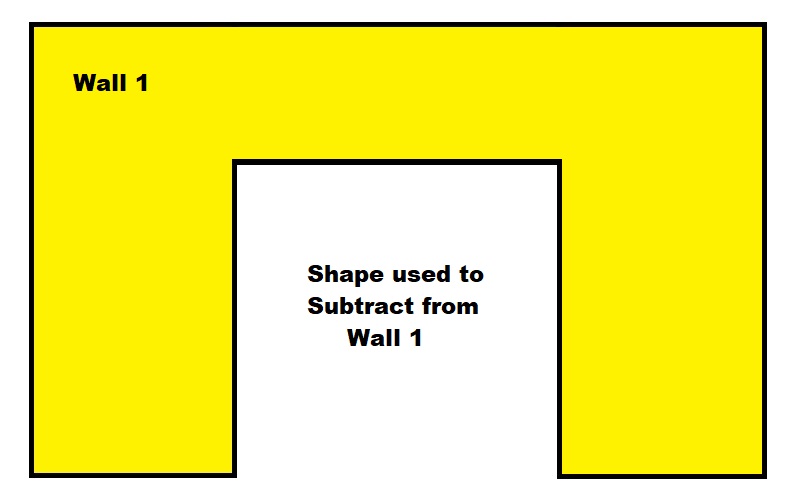
Merged Shapes a Better Method
Conceptually, we take a 3D Shape and add another 3D Shape that intersects it. Then using the properties of the second shape, we set it to Subtract from the first 3D Shape.
Here are the steps:
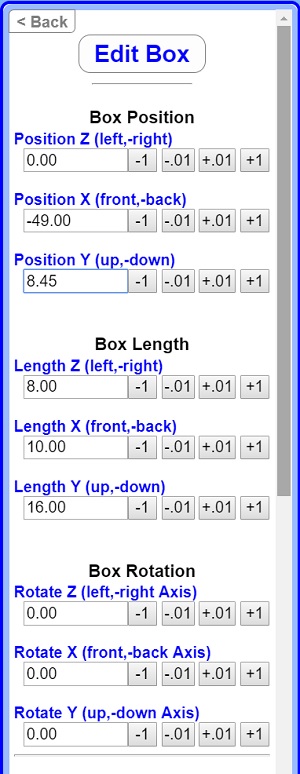
We are going to center a door opening on the front Wall.
To begin, add a Box:
Admin -> Edit 3D Building -> Add 3D Building Block -> Add Box
Center the Box on the Wall and change the Length to:
- Position: Z = 0.00 X = -49.00 Y = 8.45
- Length: Z = 8.00 X = 10.00 Y = 16.00
- Rotation: Z = 0.00 X = 0.00 Y = 0.00
Scroll down and click the link to Show Advanced Options.
Continue Scrolling Down to the section for Merge Shapes.
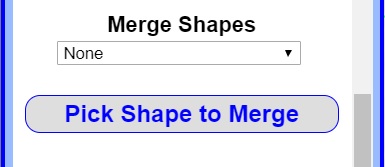
Select Subtract from Another Shape from the drop-down.
Next, click the button Pick Shape to Merge. The button text will change to Cancel Pick Shape.
Move your mouse over the Wall and click the Left Mouse Button.
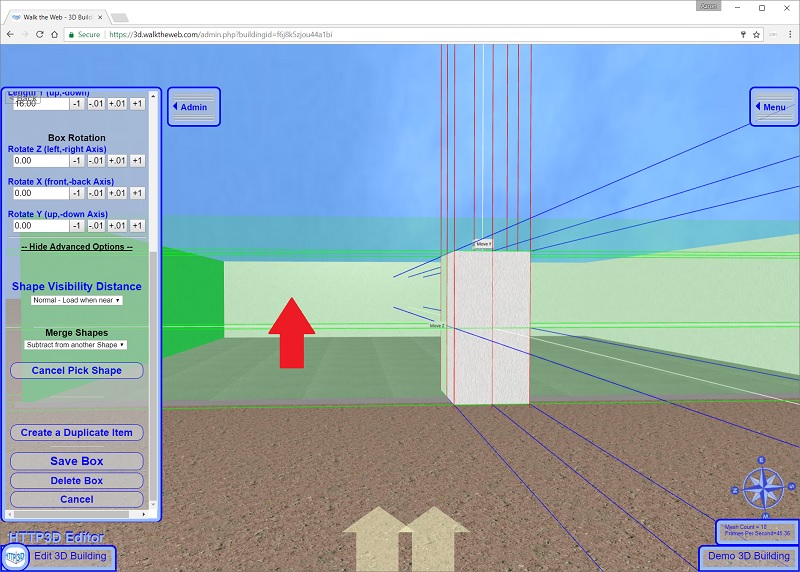
The clicked Shape will be listed below the drop-down, the Shape will be cut out (Subtracted) from the Wall, and the Shape you are merging will become transparent. See the illustration below.
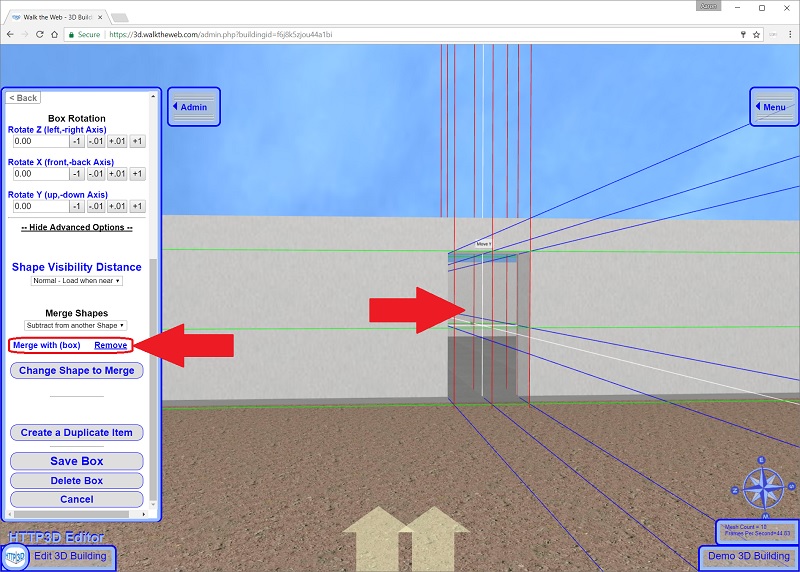
Click Save Box to finish.
Note: if you clicked the wrong object, just click the button to Change Shape to Merge and use your mouse to move over and left click the Wall again.
Repeat the above steps and create a window opening to the right of the door.
Here are some sample settings:
- Position: Z = -25.00 X = -49.00 Y = 11.00
- Length: Z = 20.00 X = 10.00 Y = 10.00
- Rotation: Z = 0.00 X = 0.00 Y = 0.00
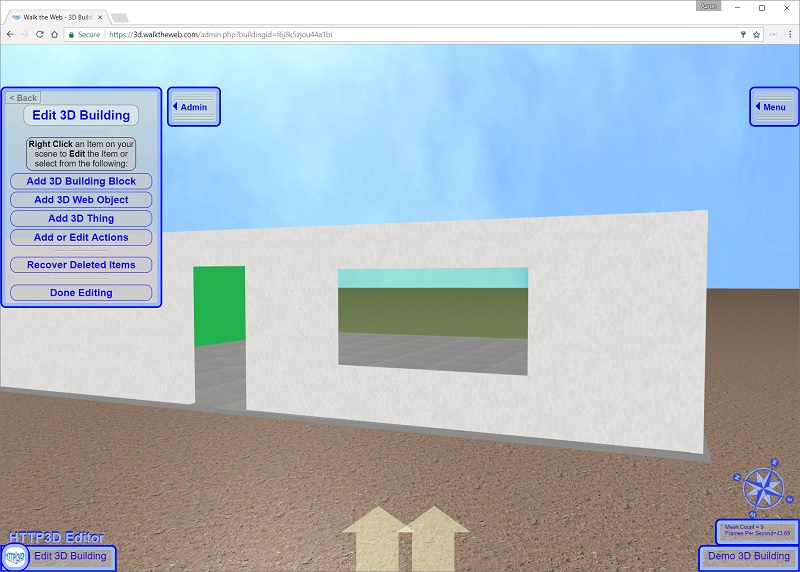
Here is the final product:
In order to edit a Subtracted Merge Shape, you will need to use option
Admin -> Editor Settings -> Show Merged Shapes
Next is a walk-through of the Editor Settings.