- /
- /
- /
- /
- /
Add or Edit your Product Displays
By Aaron Dishno Ed.D.
Each one of the 3D Stores come with a number of product displays. Often it is not the number of products you have, or you would like to change the size, color, or placement of the product displays. This article will show you how to edit your 3D Store Building to change the product displays.
This article is an extension on the 3D Store installation.
To begin, go to https://3d.walktheweb.com in your browser.
Click Menu and Login.
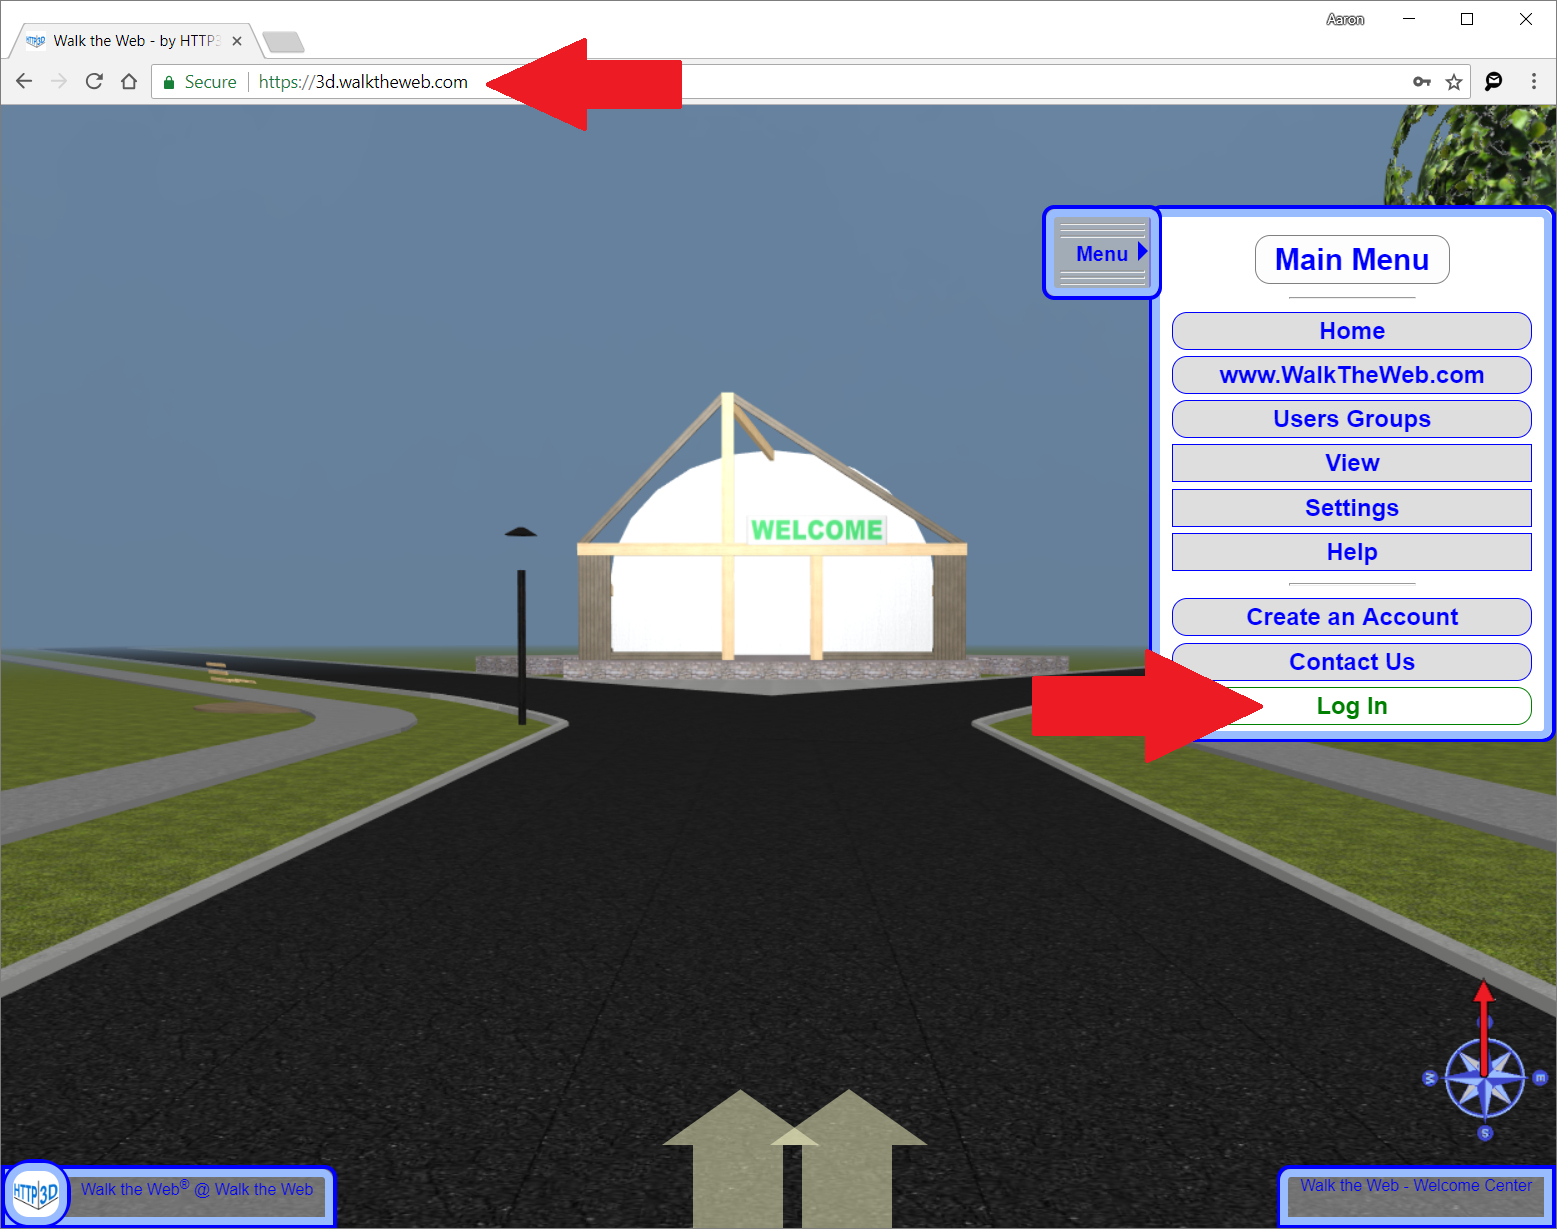
Use the WalkTheWeb Login and Password you created in the 3D Store Plugin. It is the same login used on https://www.walktheweb.com.
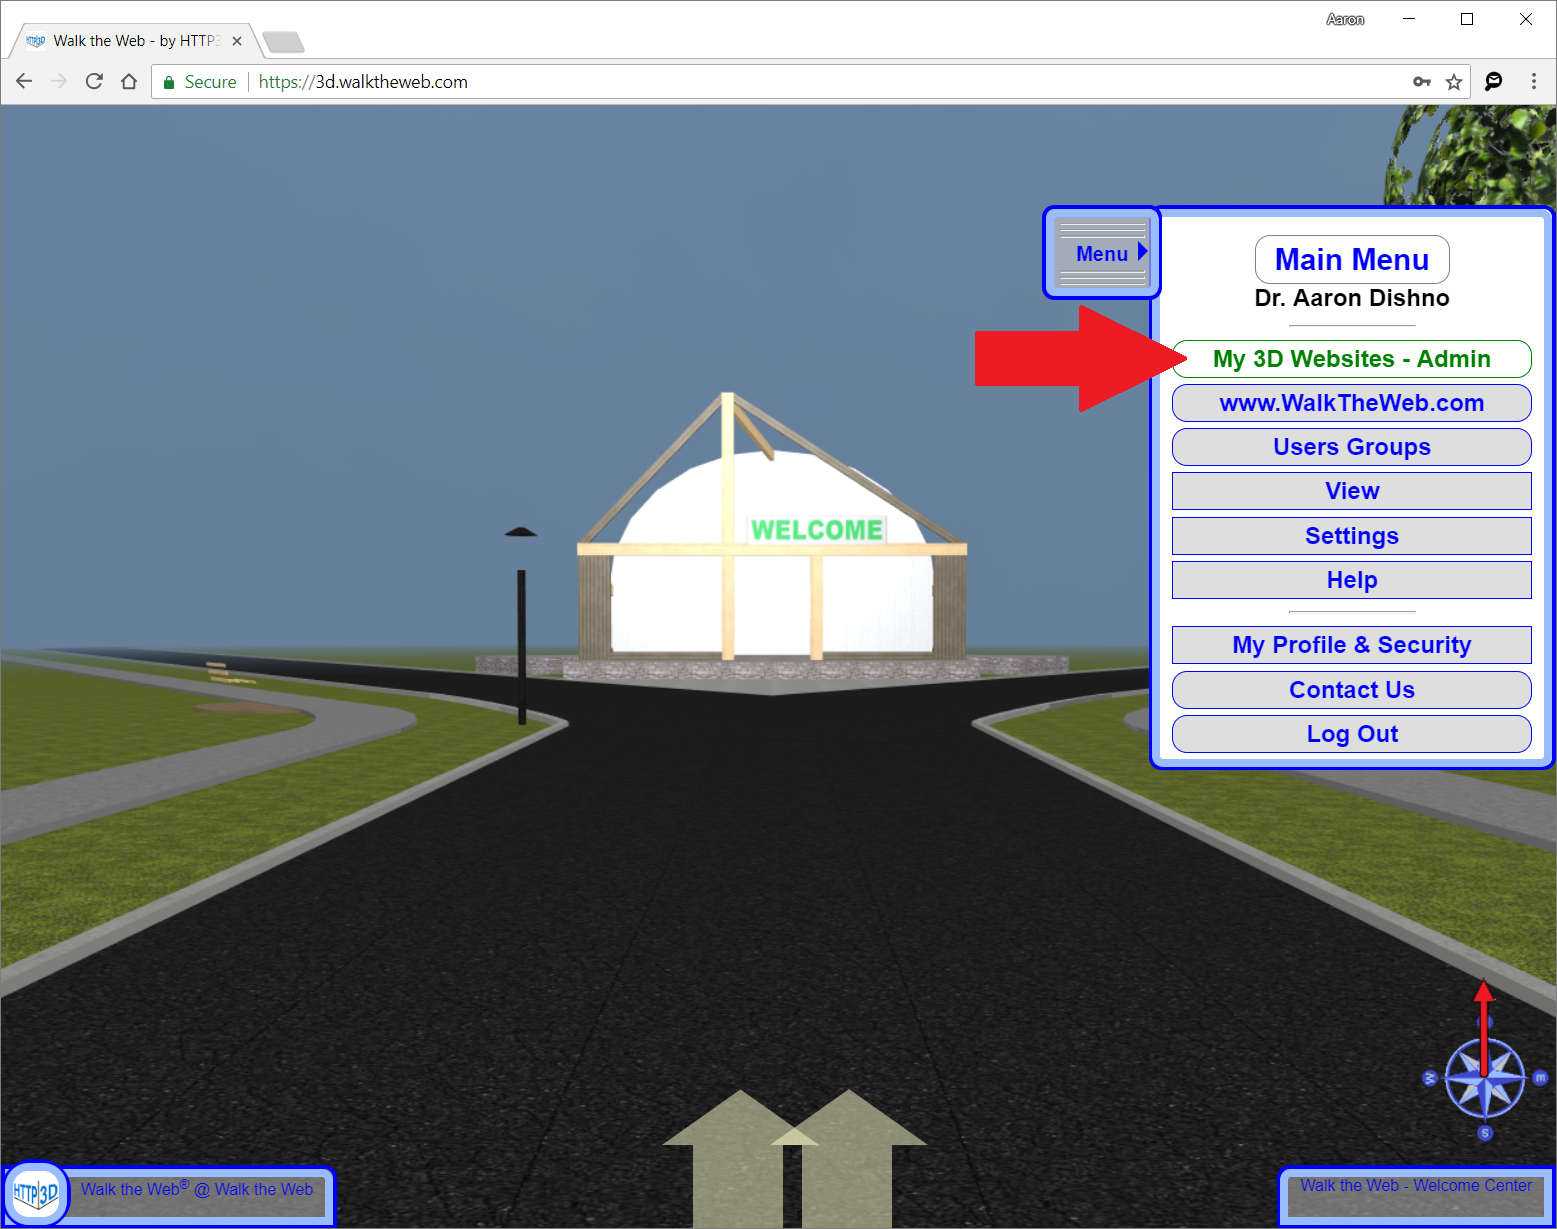
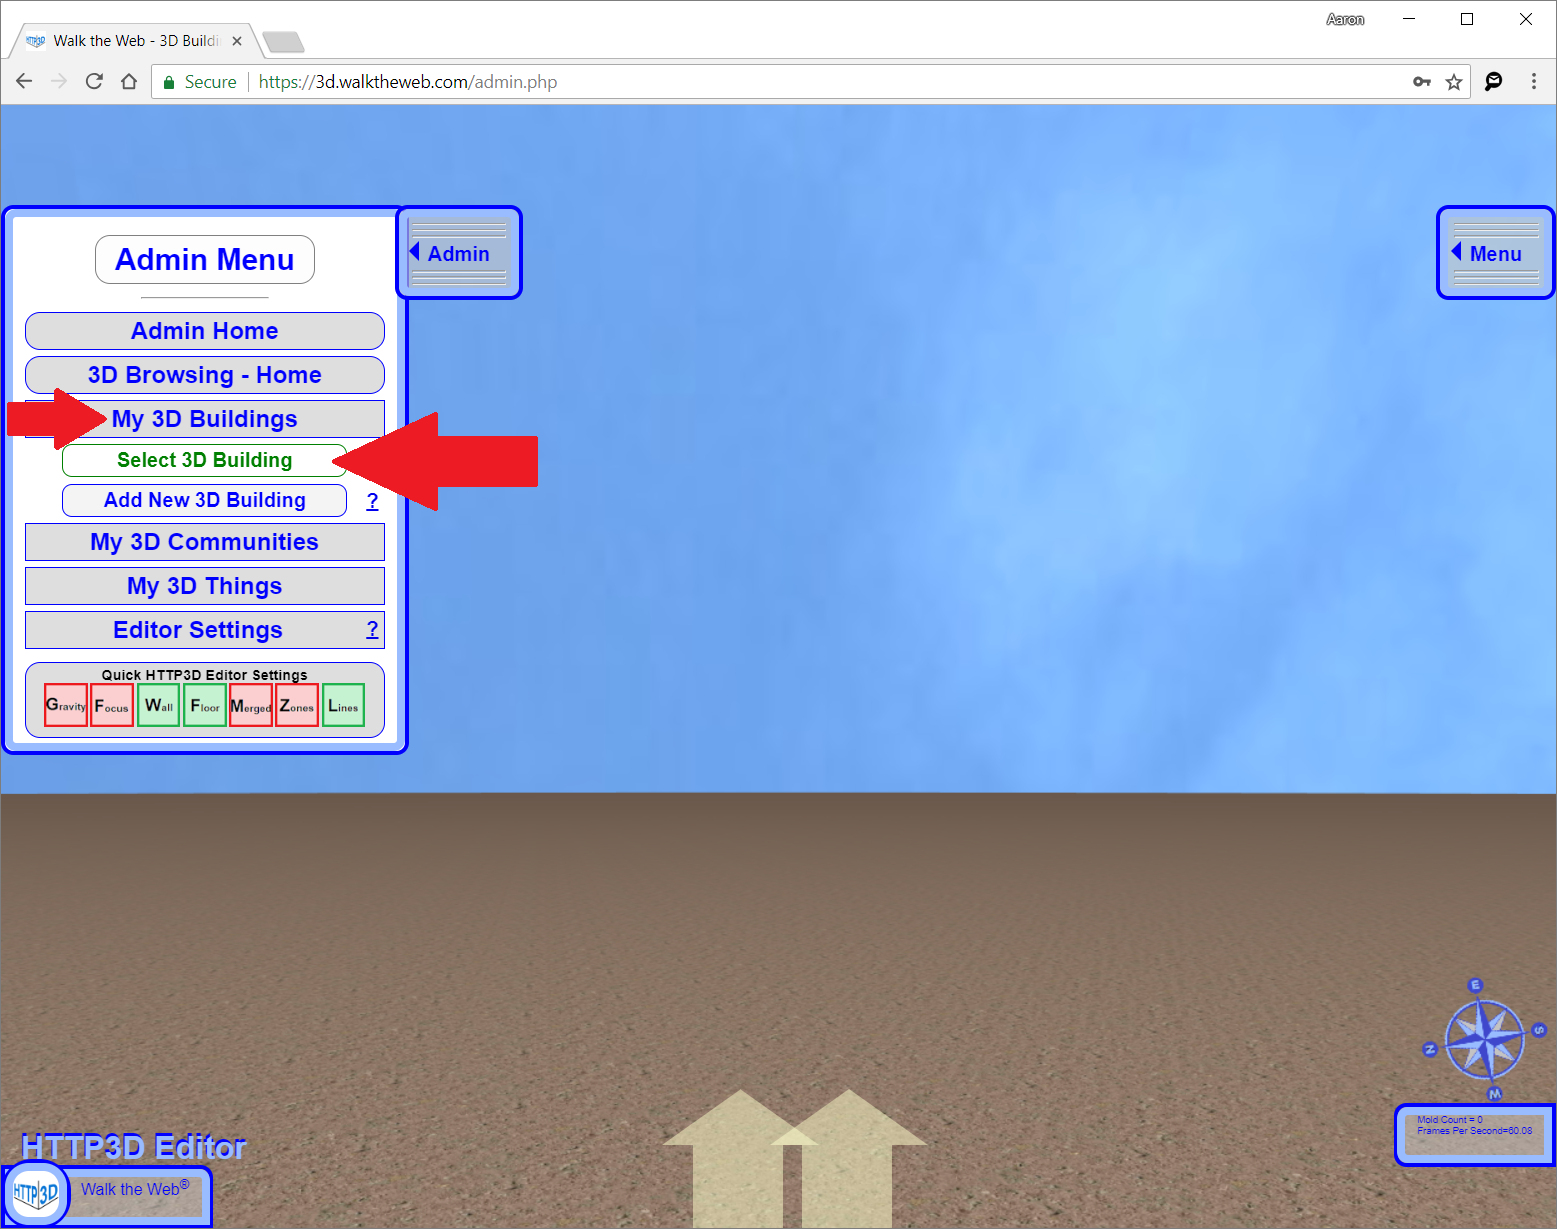
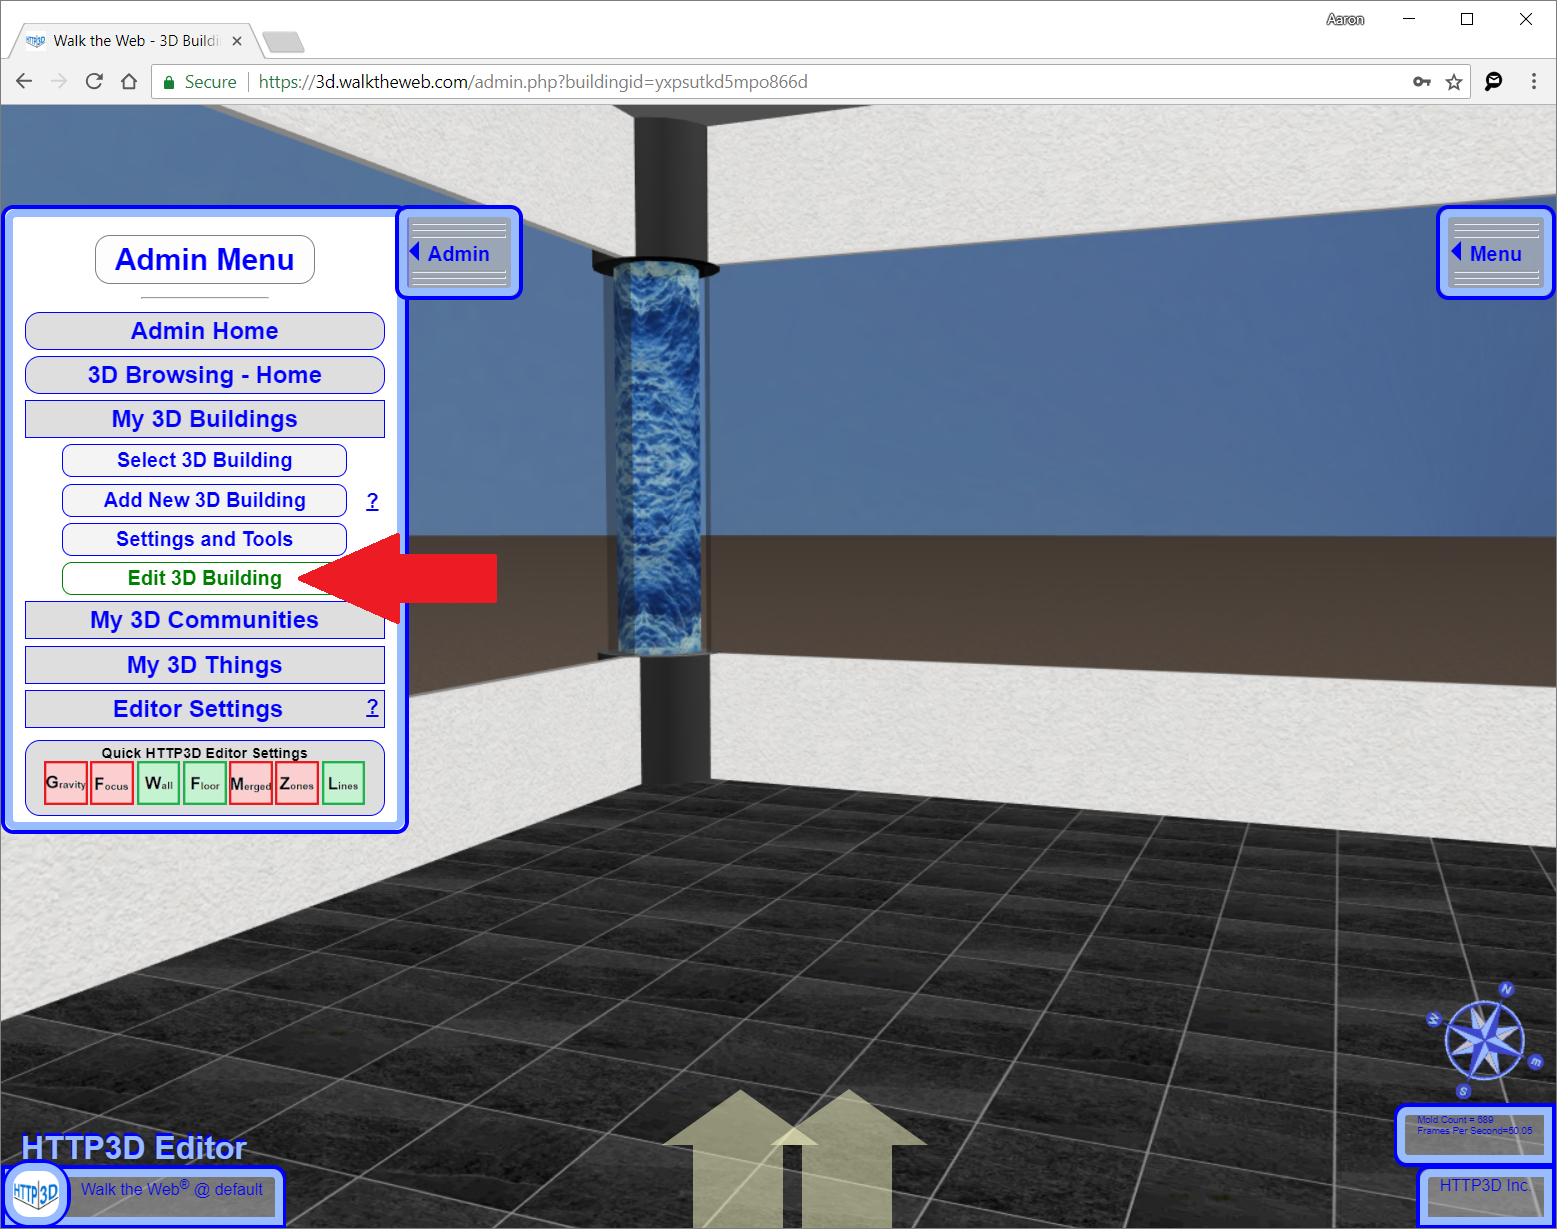
From the Admin menu, click My 3D Buildings and Select 3D Building.
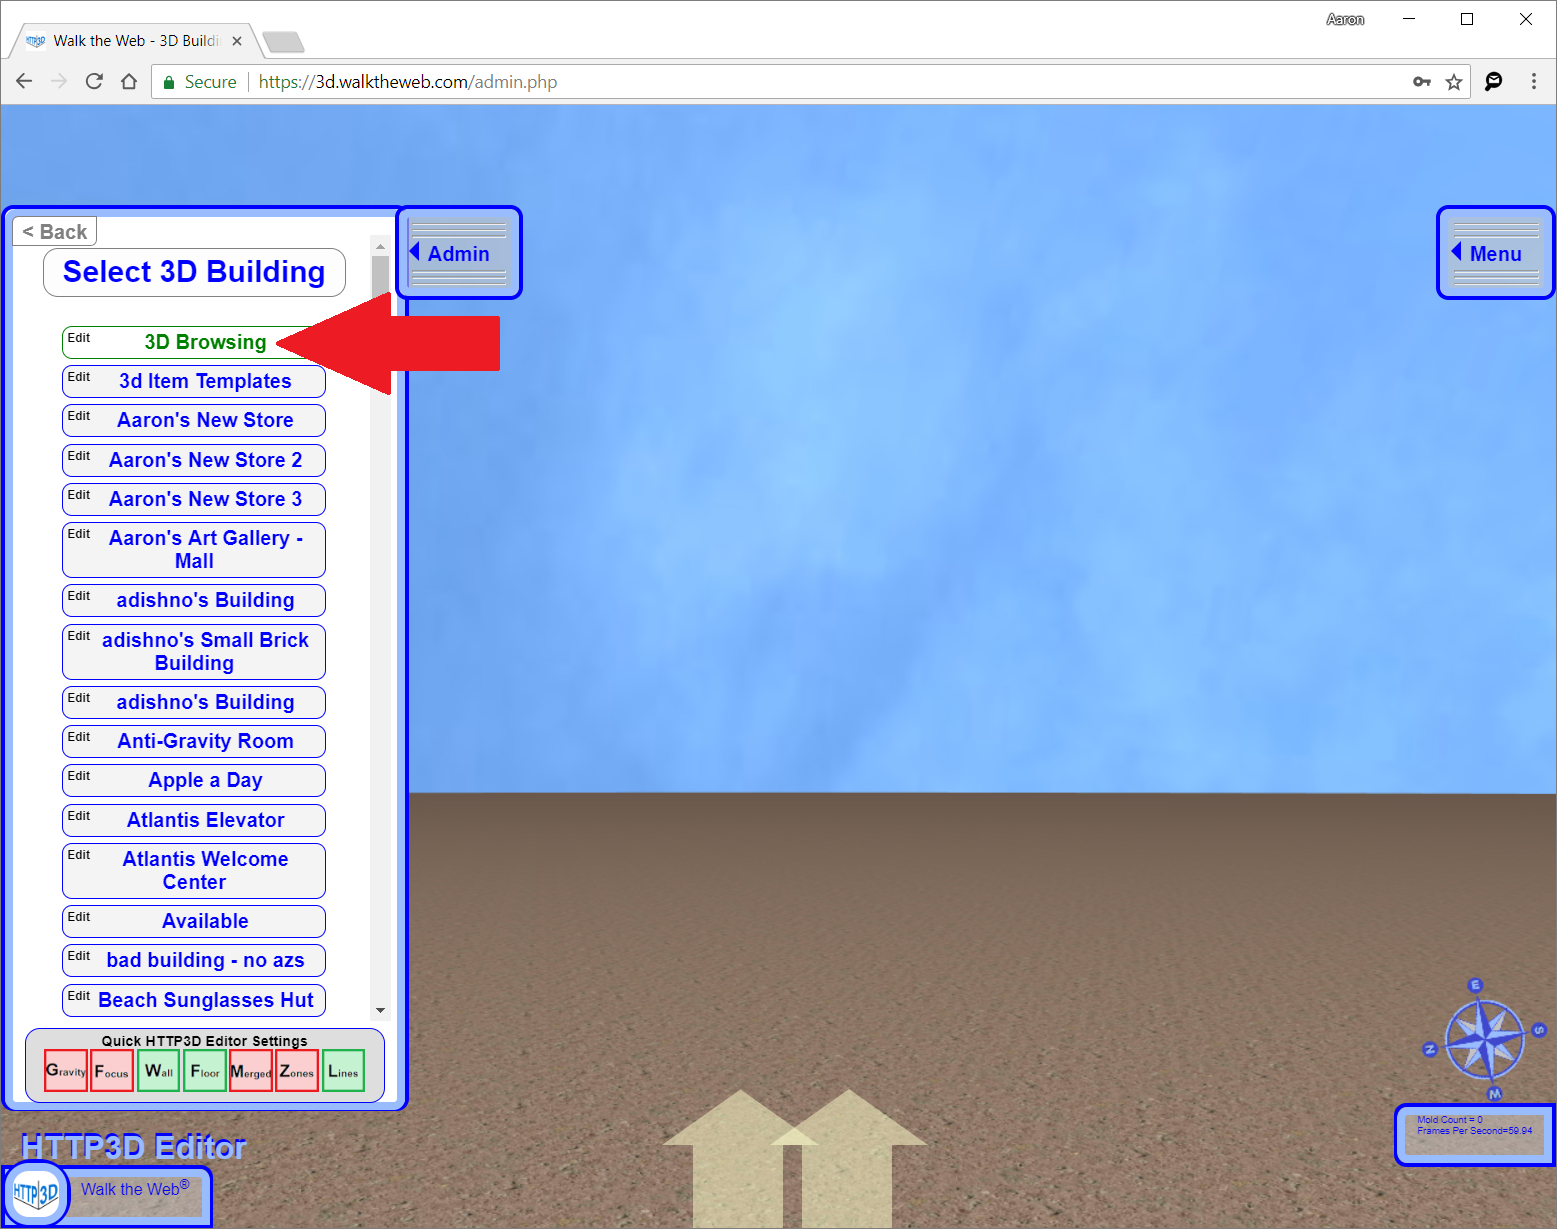
Select your 3D Store Building from your list of 3D Buildings.
Edit an existing Product Display
Right click on the Product Display you wish to edit.
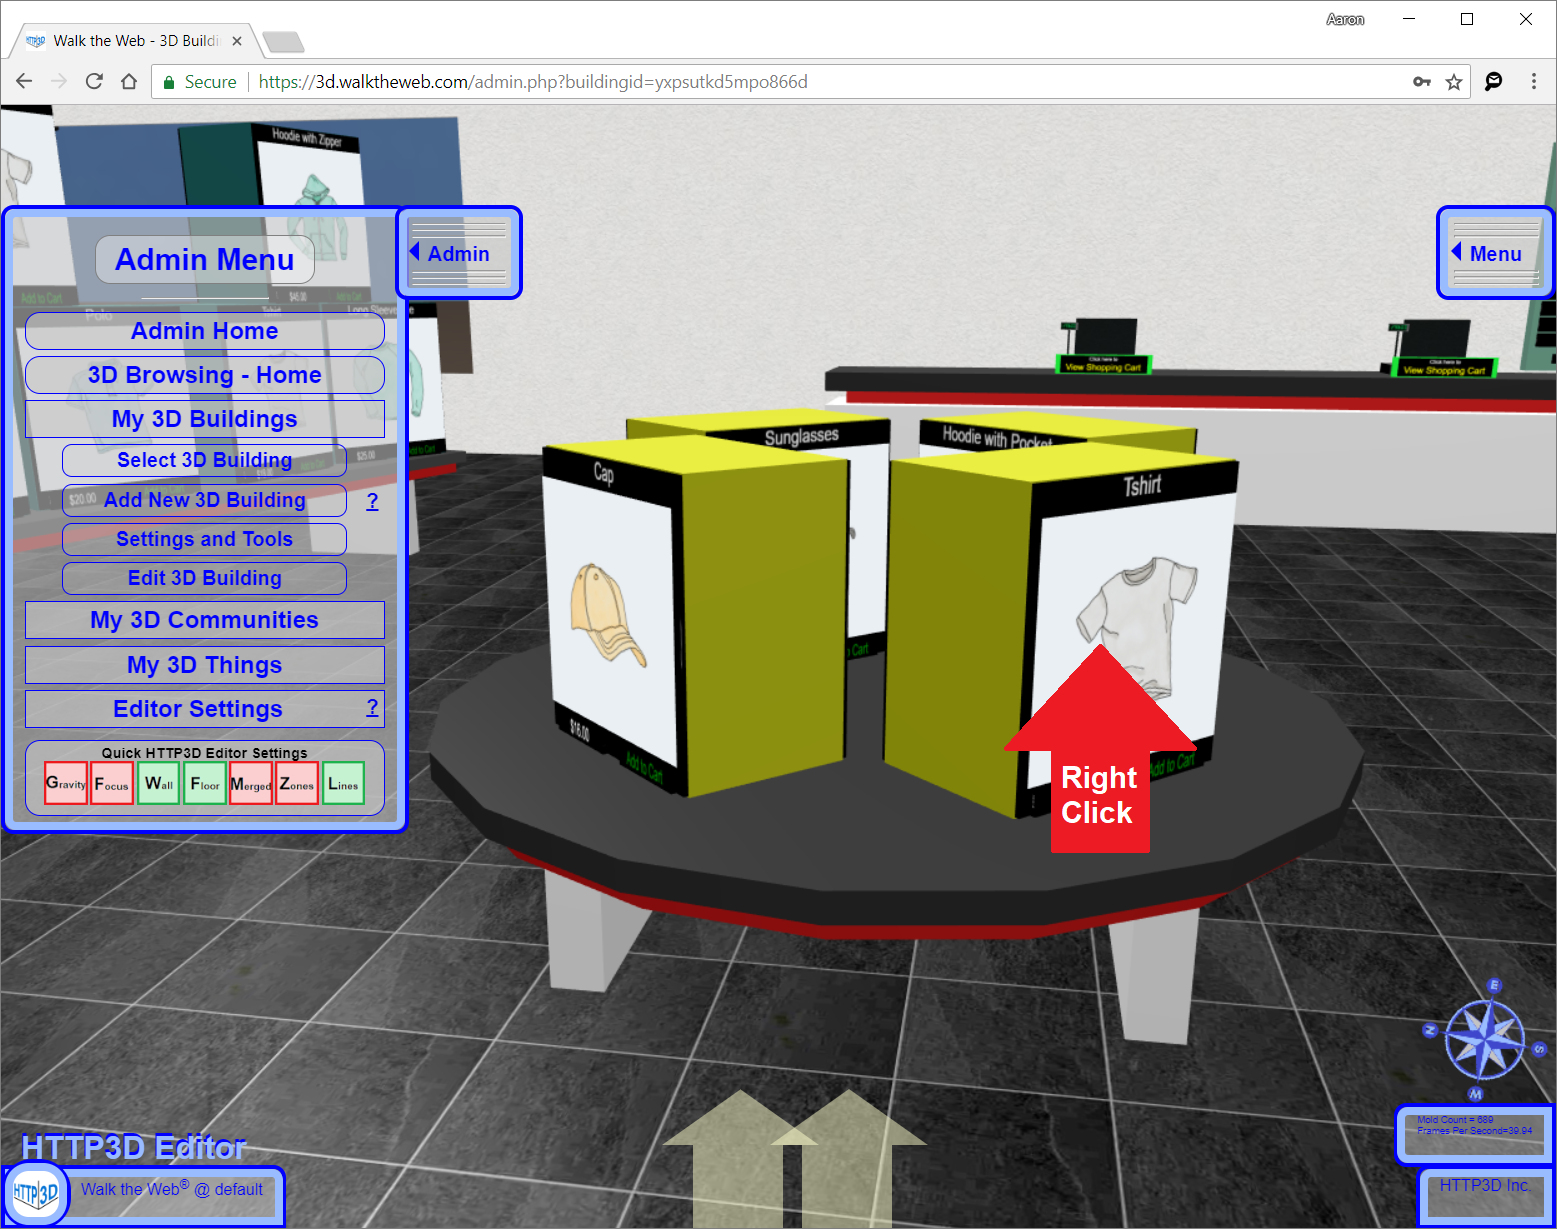
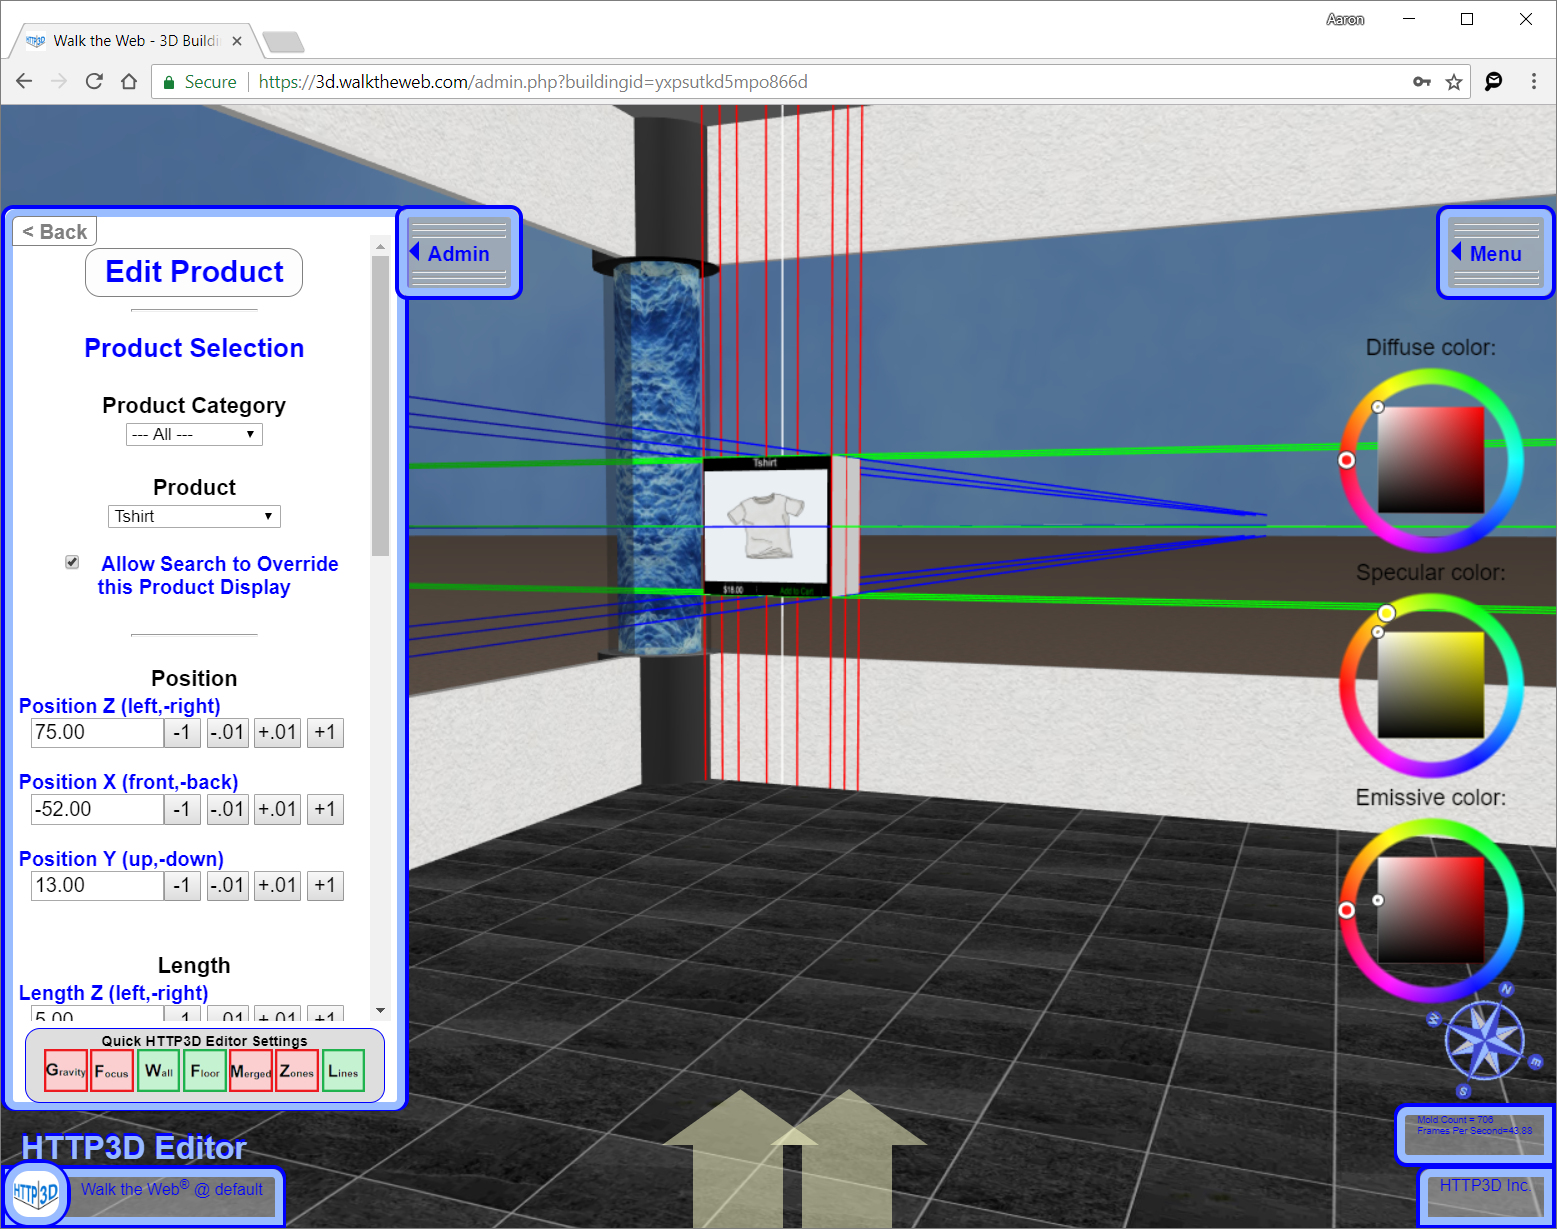
After you select a Product Display to edit, you will see:
- Edit Product box
- Guide lines
- Color Selector
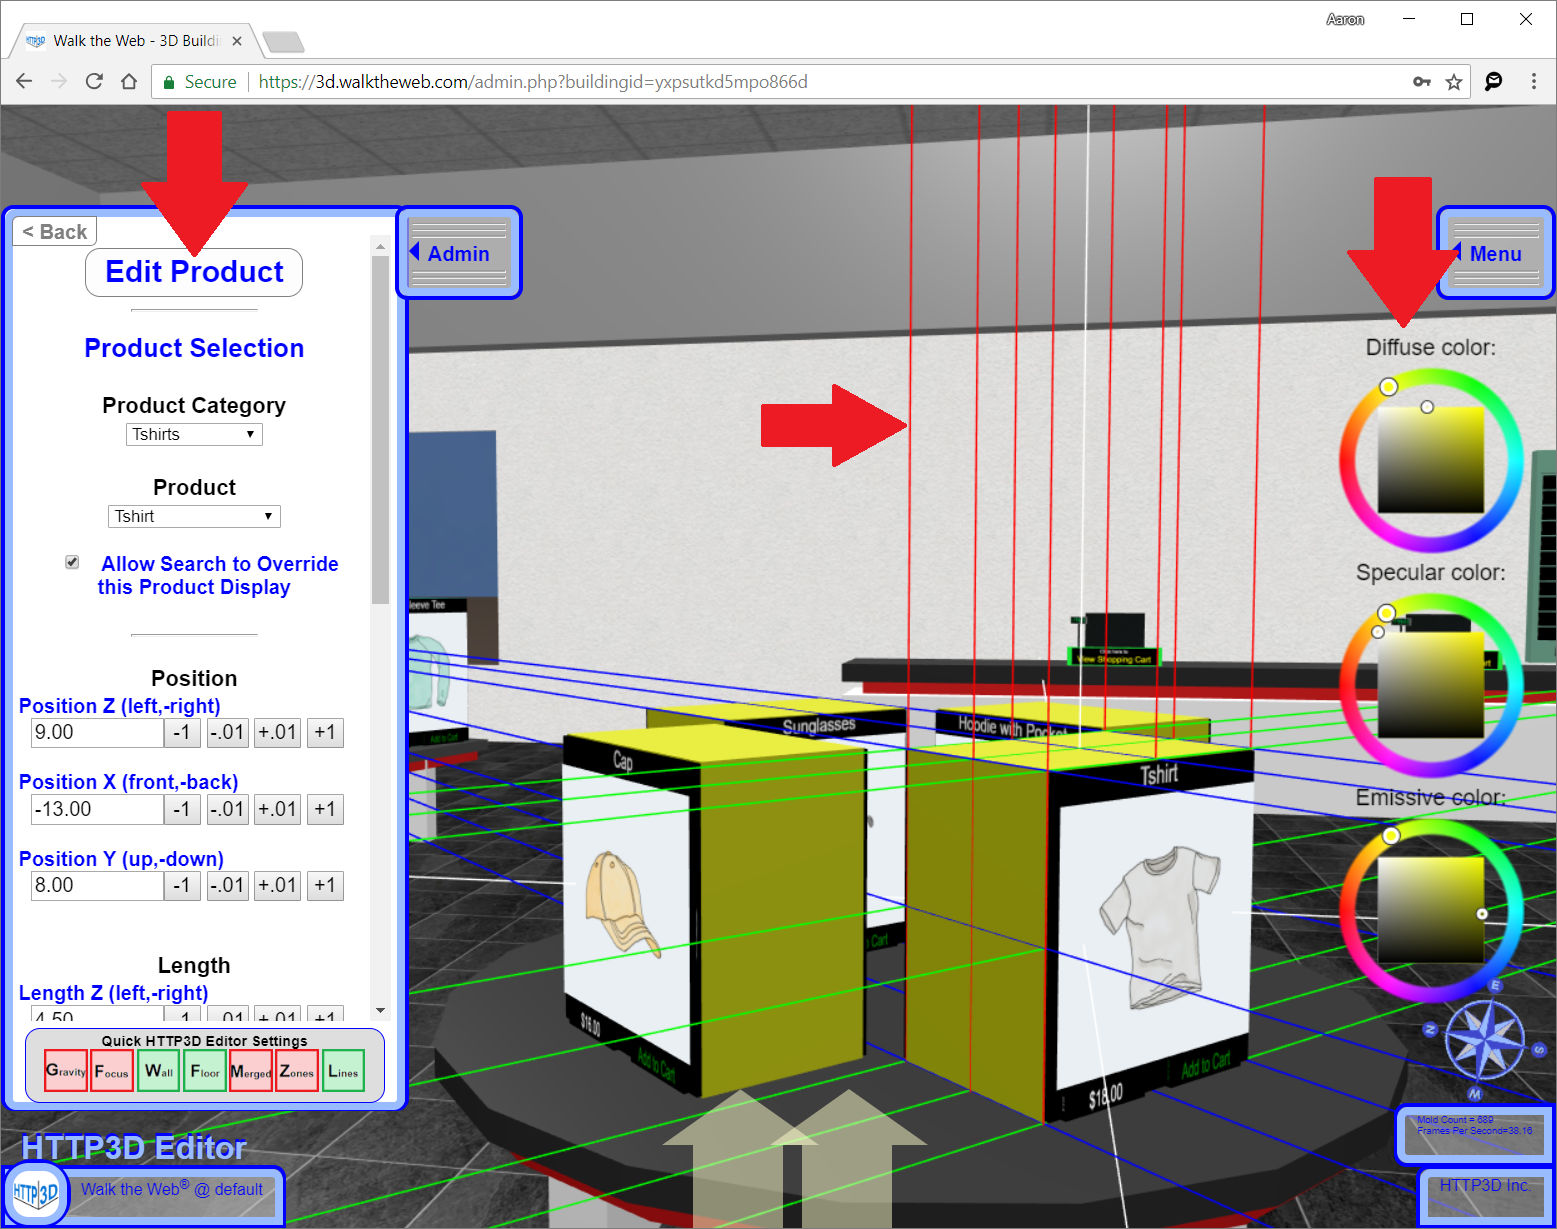
Edit Product Box
The Edit Product box has many parts that change depending on the options selected. Here are some of the main parts.
Product Selection – if you set a product, that box will always have that product when loading.
Allow Search to Override this Product Display – When checked, this box will reload and display products from search results or when a category is selected. If un-checked, the original product loaded will remain.
Position – Adjust the X, Y and Z position of the object. Note you can hold down a button to keep moving. The left and right button moves larger distances and the middle buttons help fine tune the movement.
Length – X, Y, and Z will resize the Product Display. You will want the display to be at least 0.25 thick (X value) for the buttons to properly display.
Rotation – You can rotate a Product Display along the X, Y, and Z axis.
Covering Type – The default for a Product Display is Color. Another option is to set a Texture. Once selected in the drop-down, the color selectors will disappear and a button to change the texture will appear under Covering Type.
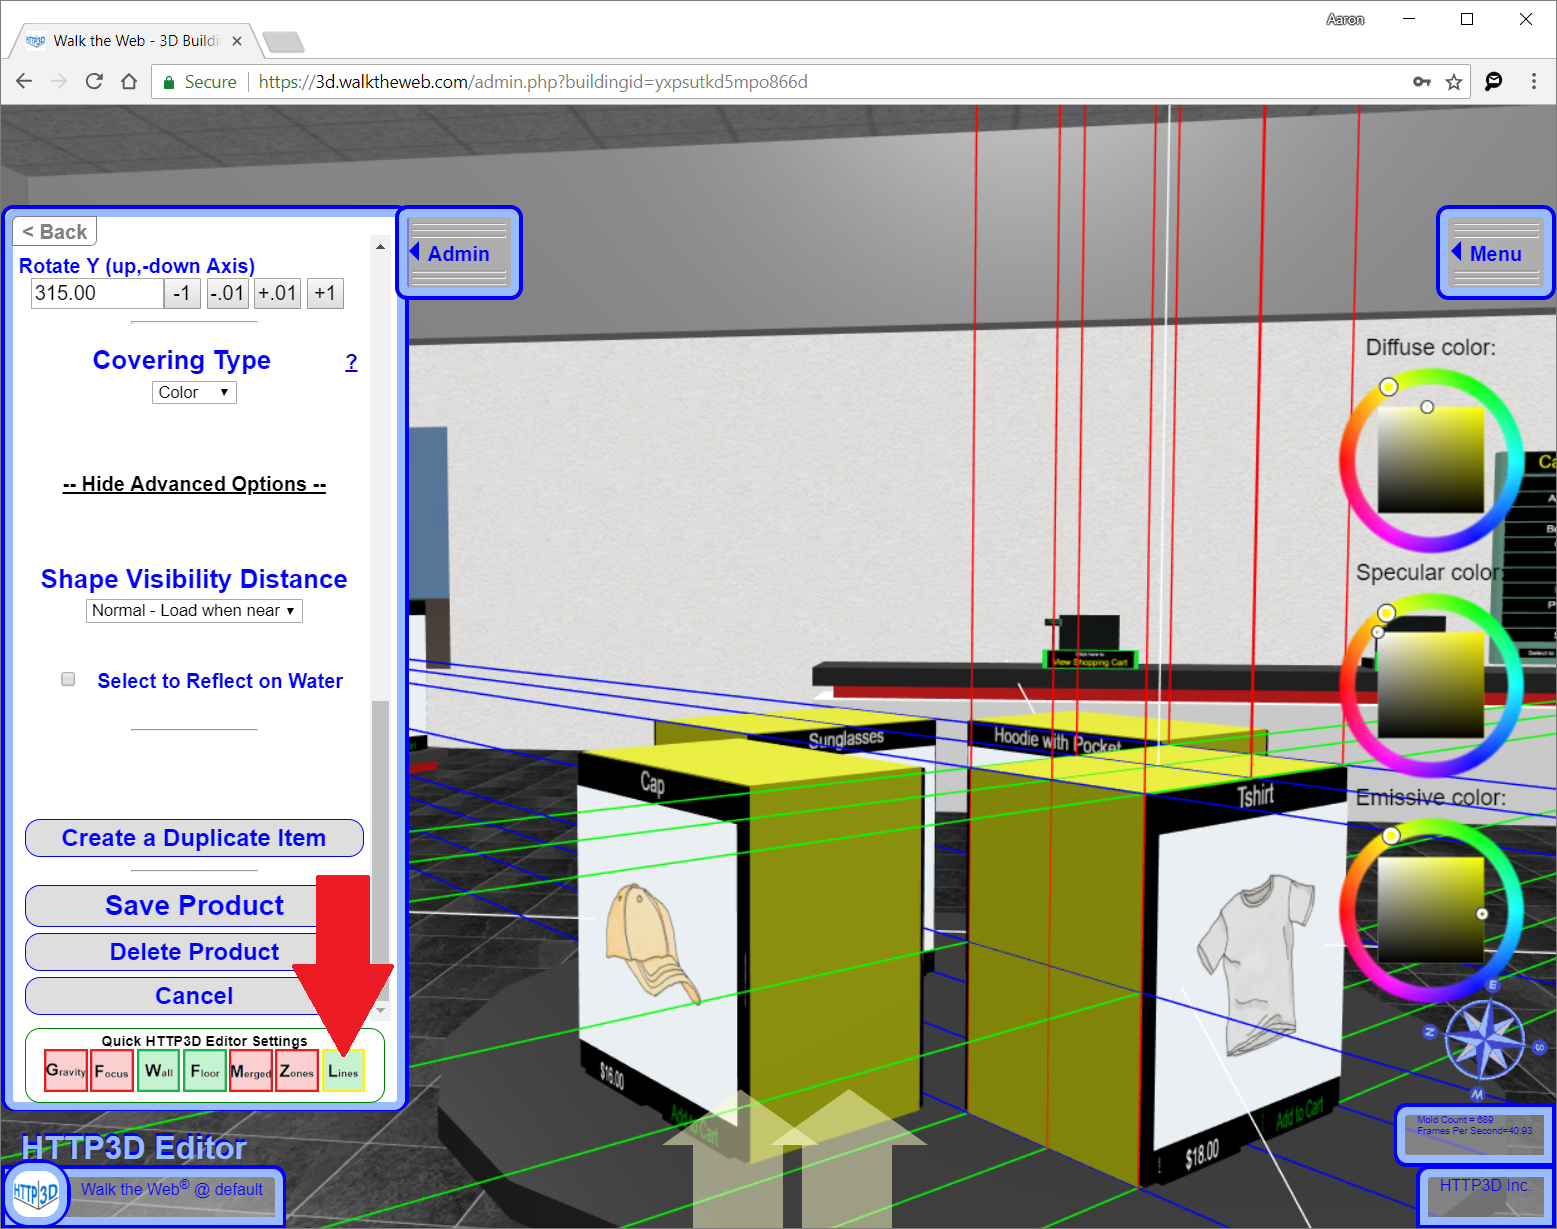
Advanced Options – This section shows options for when to load (Shape Visibility Distance), reflect on water when near water, and texture related scaling and alignment when a texture is selected.
Create a Duplicate Item – will create a new Product Display just like the one selected that you can position, scale, rotate to your desired location.
Save Product – To update the Product Display.
Delete Product – To delete the Product Display and remove it from the 3D Building.
Cancel – To undo the changes and revert back to the previous settings.
Guide Lines
Guide Lines are helpful in aligning objects in 3D space. Sometimes they can get in the way. Using the Lines button on the bottom of the Edit Product box can toggle the guide lines off and on as needed.
Color Selector
The color selector has 3 settings:
- Diffuse Color – This is the color that is shown from the sun lit direction (side – top).
- Specular Color – This is the color shown from the reflective sunspot.
- Emissive Color – This is the color of the base object.
As you hold your left mouse button down in the square or outer circle, you can move the mouse to adjust the color. The Product Display will change color as you go.
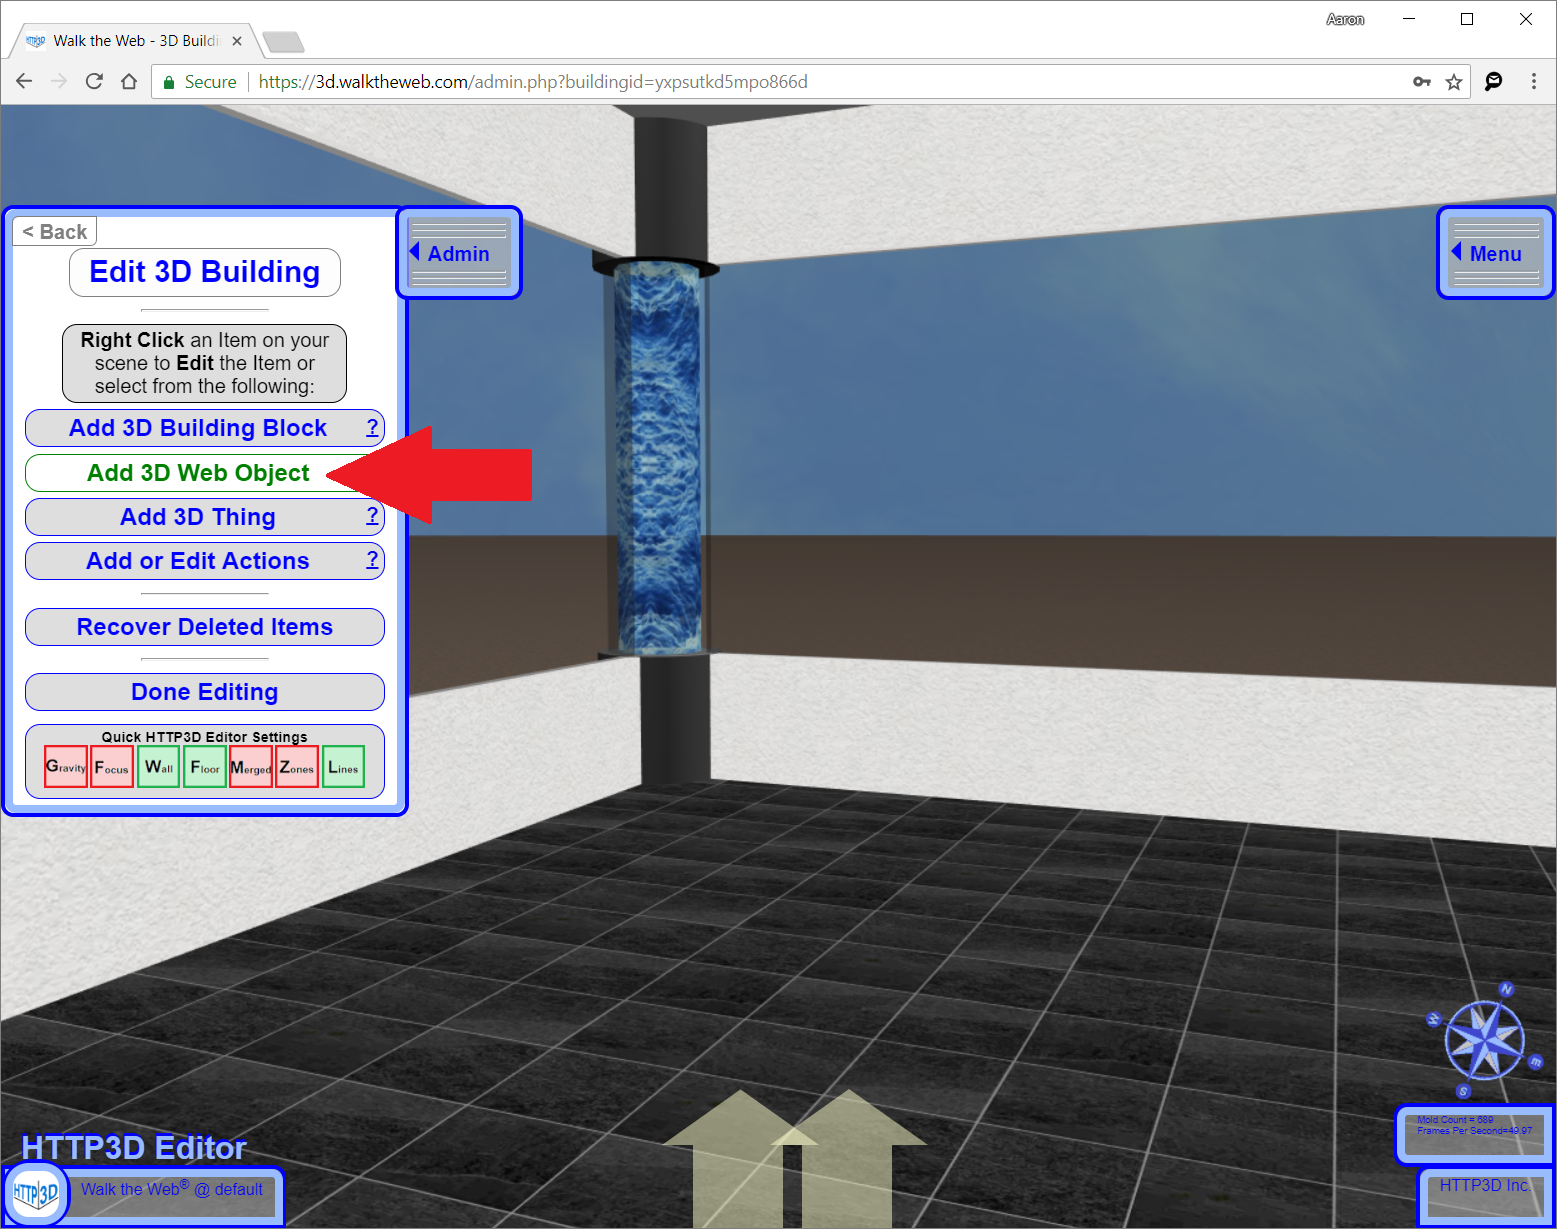
Add a New Product Display
To add a new Product Display, Walk to the location near where you want the product. When you add it, the Product Display will be placed directly in front of you.
Click Add 3D Web Object
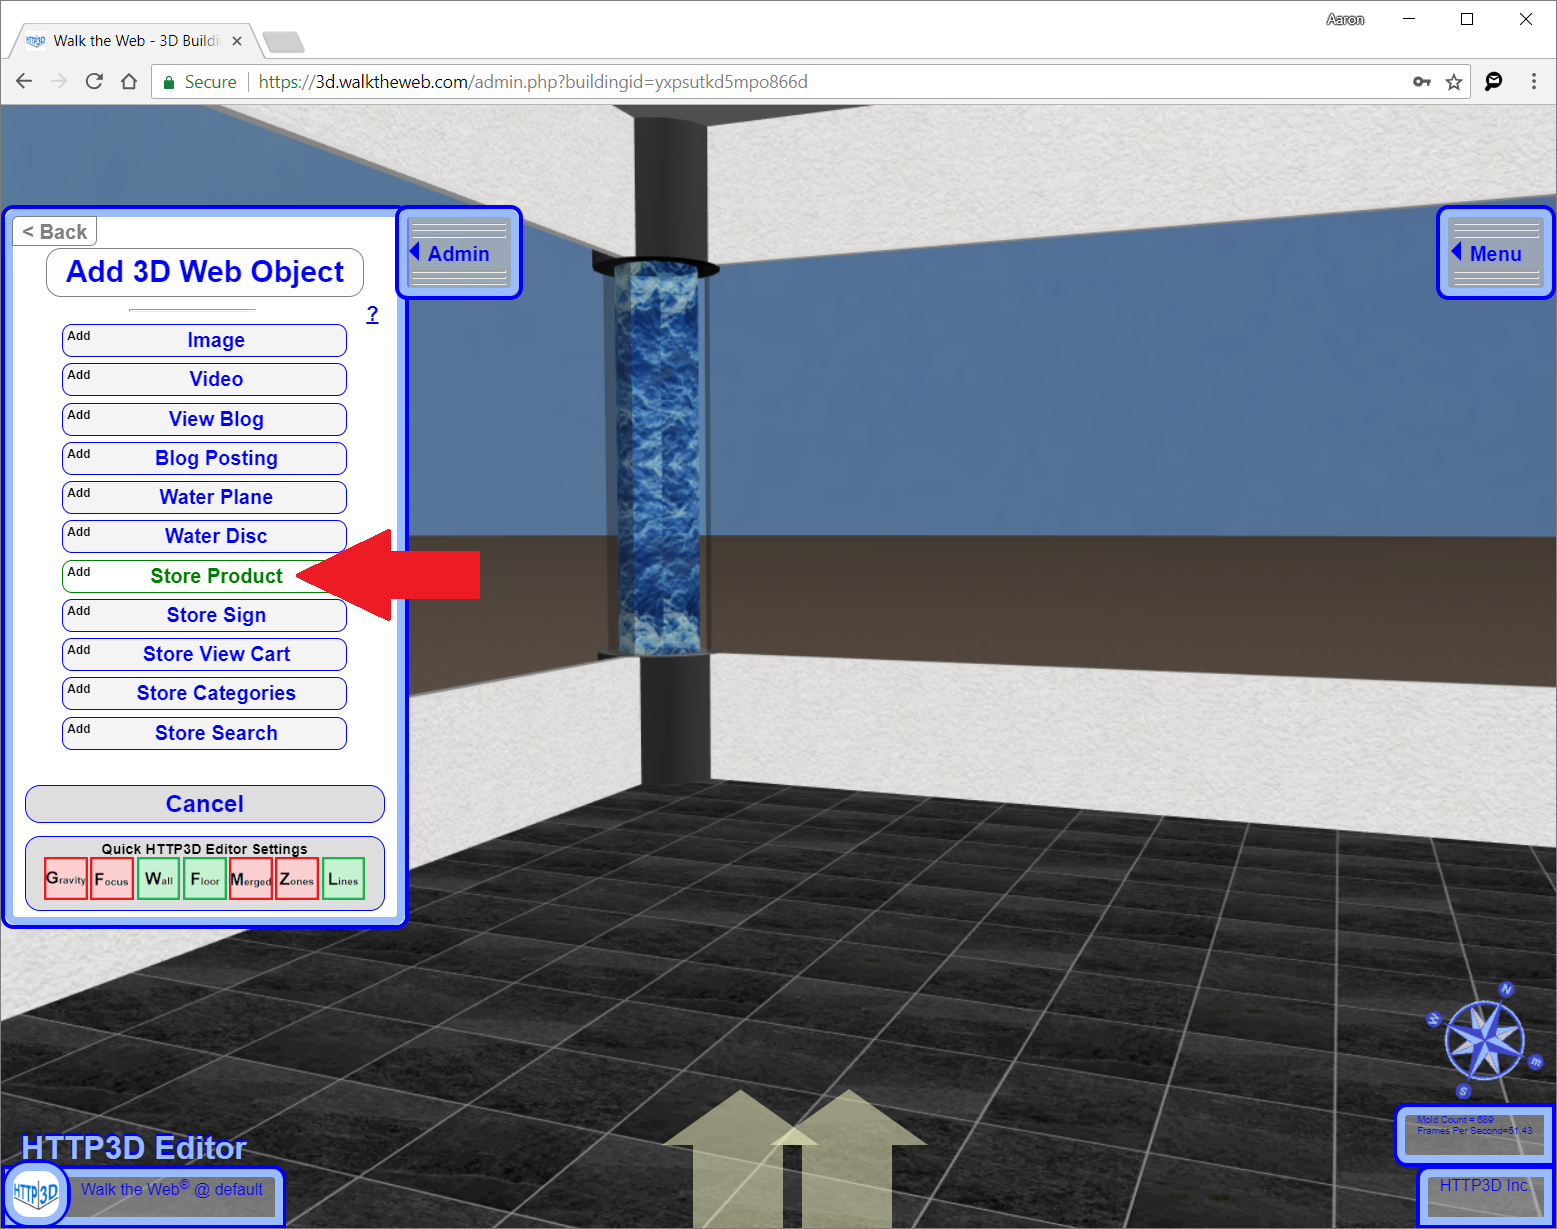
Click Store Product
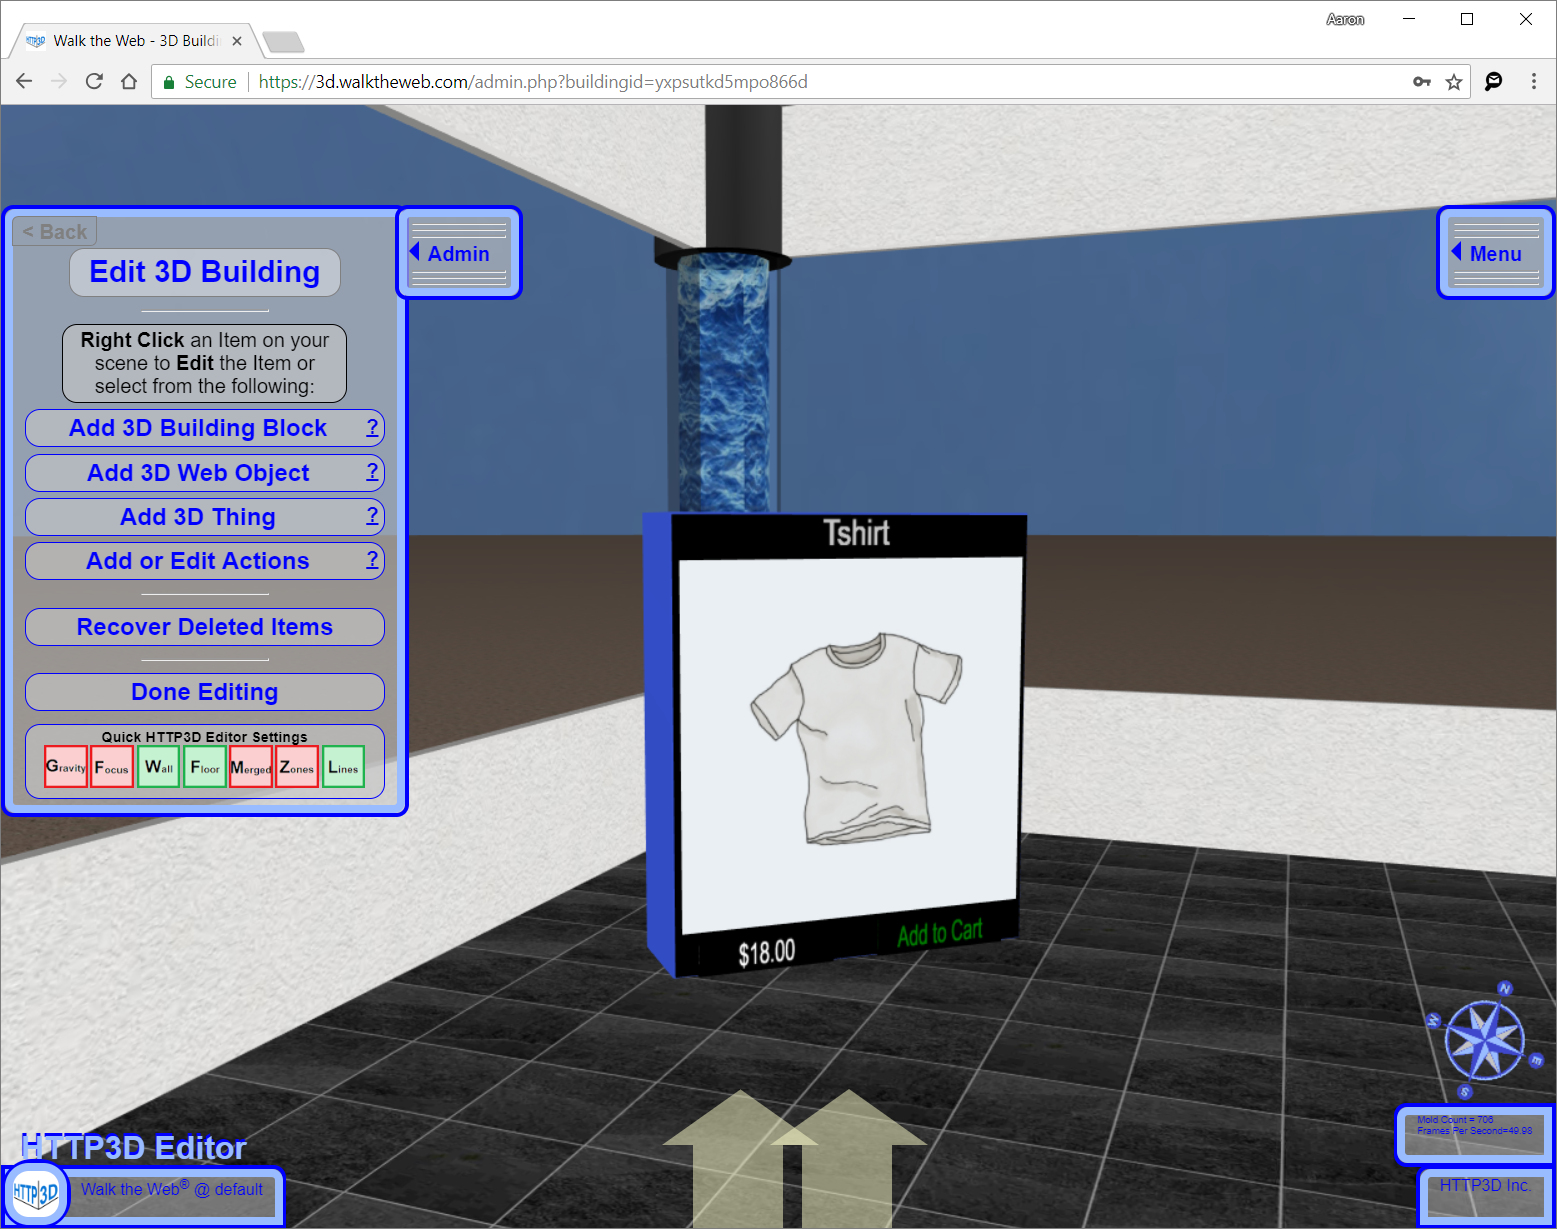
The Product Display will be added and you can use the Edit Settings as shown above to style, position, size, and rotate the display.
When you finish, click the Save Product button at the bottom of the Edit Product box.
Happy 3D Browsing!