- /
- /
- /
- /
- /
WooCommerce 3D Store Plugin Installation
By Aaron Dishno Ed.D.
This article takes you through the WooCommerce – 3D Store plugin installation. This plugin is used to create and manage 3D Stores that connect to your WooCommerce Shopping Cart and Products.
To start, download and activate the WooCommerce – 3D Store plugin from WooCommerce Extensions.
Jump to:
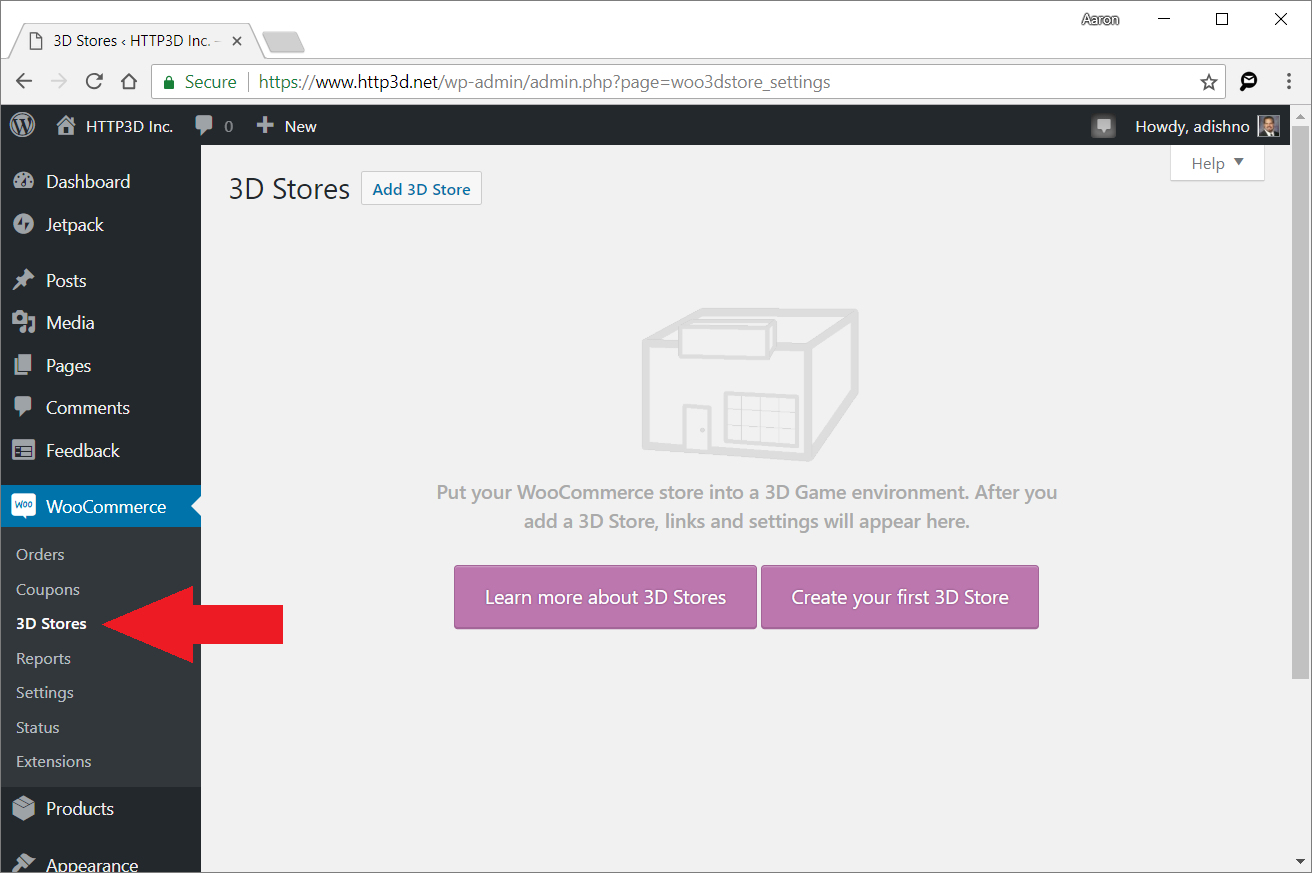
Getting Started
Navigate to WooCommerce -> 3D Store on your WordPress admin menu.
Click Create your first 3D Store to begin.
(Alternatively, you can use Add 3D Store).
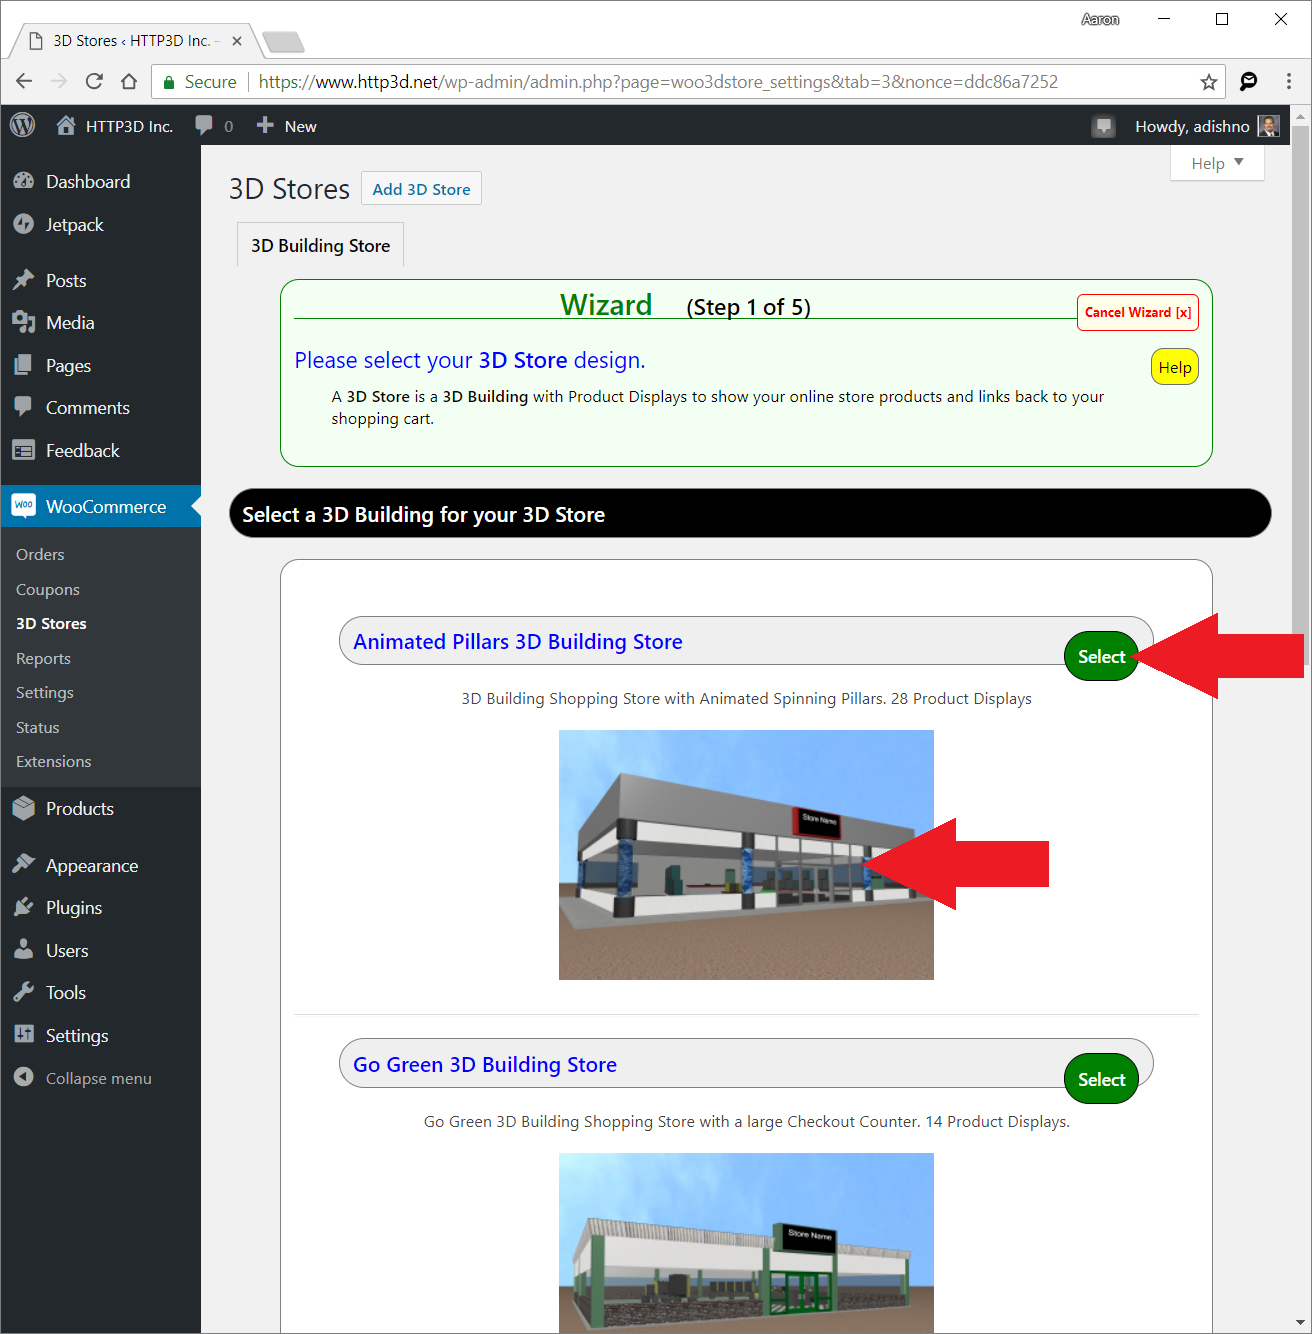
Step 1 – Select a 3D Building for your 3D Store
Click a 3D Store image or the Select button to pick a 3D Store from the templates.
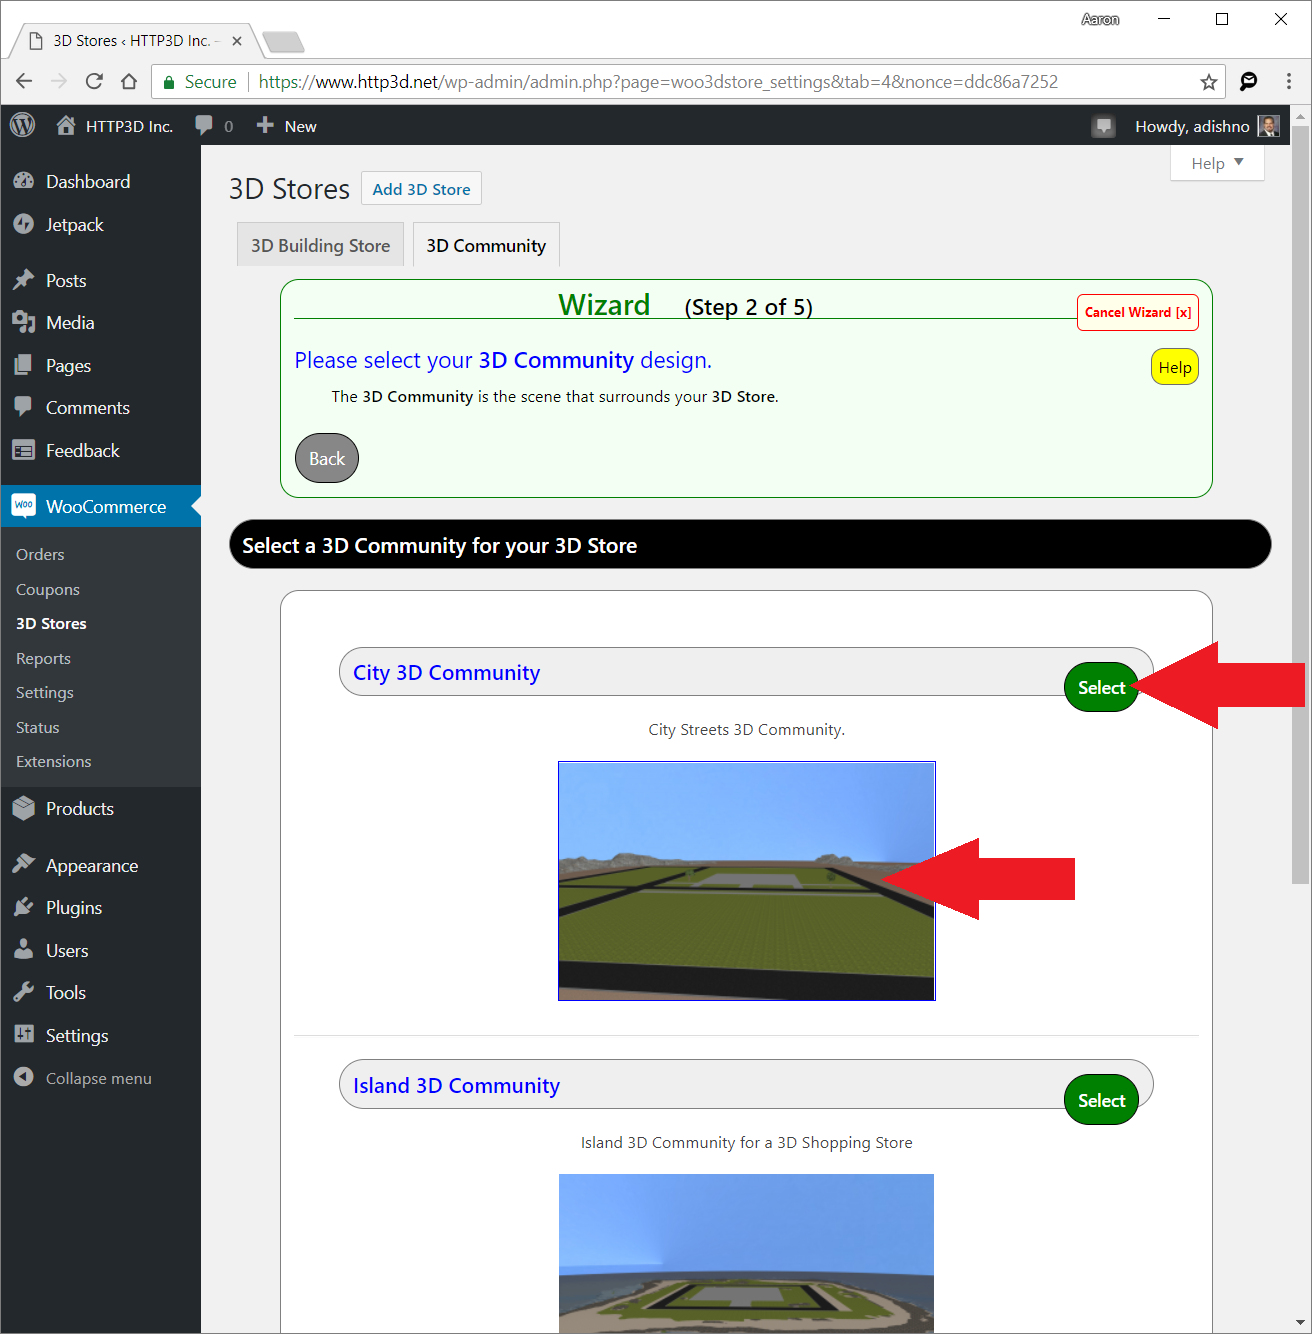
Step 2 – Select a 3D Community for your 3D Store
Click a 3D Community image or the Select button to pick a 3D Community scene from the templates.
The 3D Community provides the landscape and surrounding 3D Things that makeup the 3D Scene.
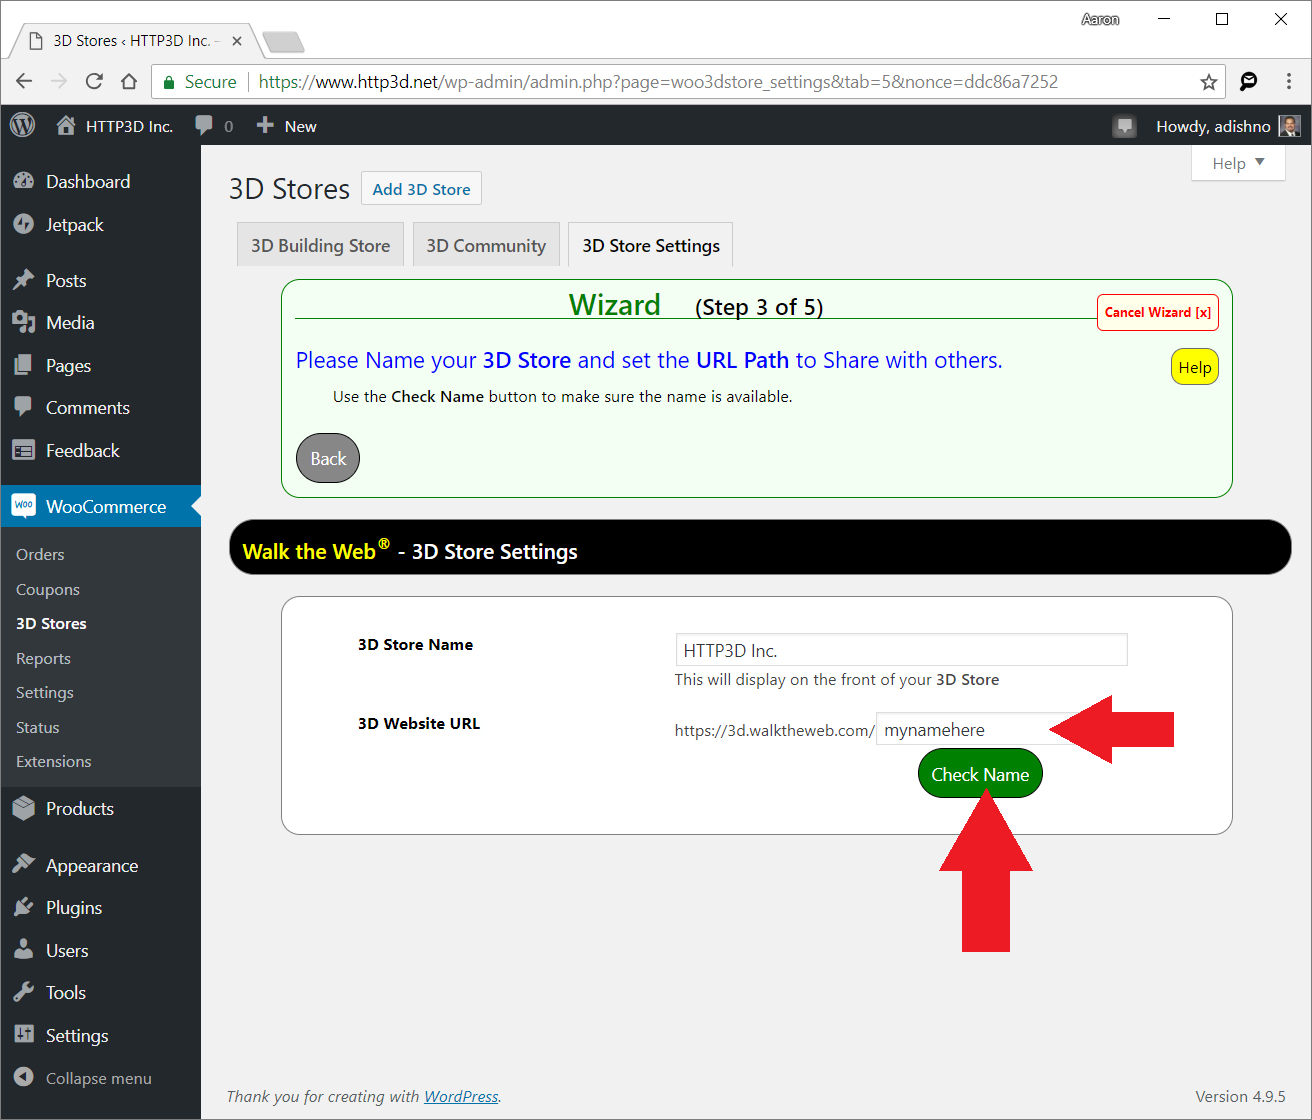
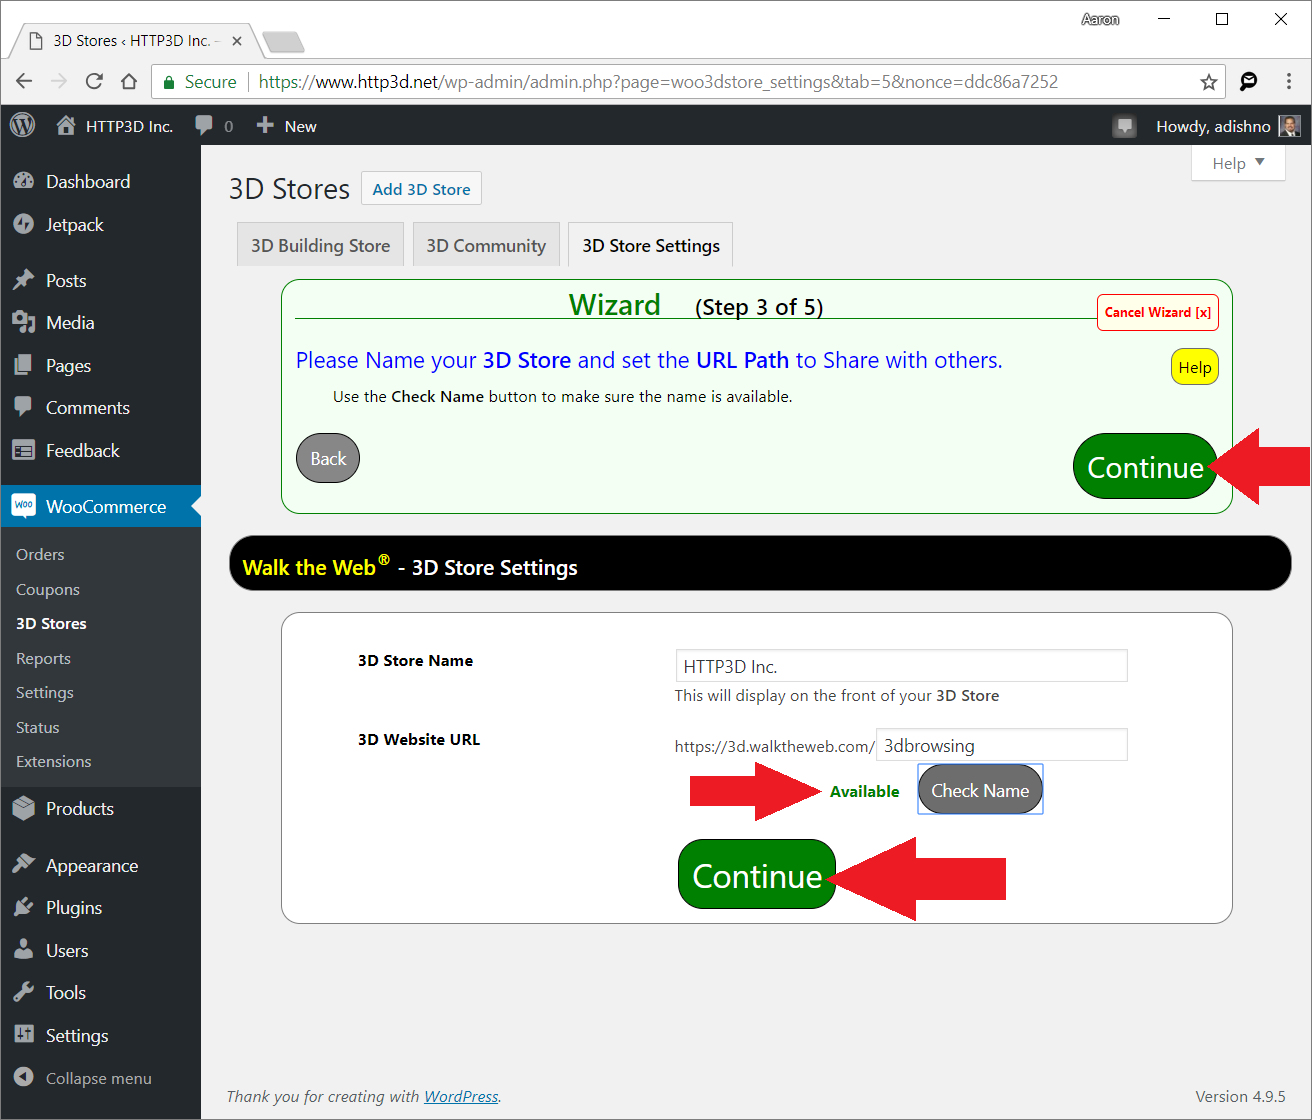
Step 3 – Name and URL for your 3D Store
The 3D Store Name is used on the outside sign of your 3D Store.
The 3D Website URL creates the browsing path to your website.
After you enter a path name, click the Check Name button to make sure it is available. (Paths can only be characters (a-z) numbers (0-9), hyphens -, and periods.)
If you are already using a 3D Website URL it will let you know with a warning. You can continue with that name and the system will automatically rename the other site based on your user login name. You can view the new name and change it if you desire following the Create 3D Store steps. Otherwise, you can choose another name and change it manually after the new site is done.
When you have entered a 3D Store Name and an available 3D Website URL, the Continue buttons will appear.
Click Continue.
(Both do the same thing.)
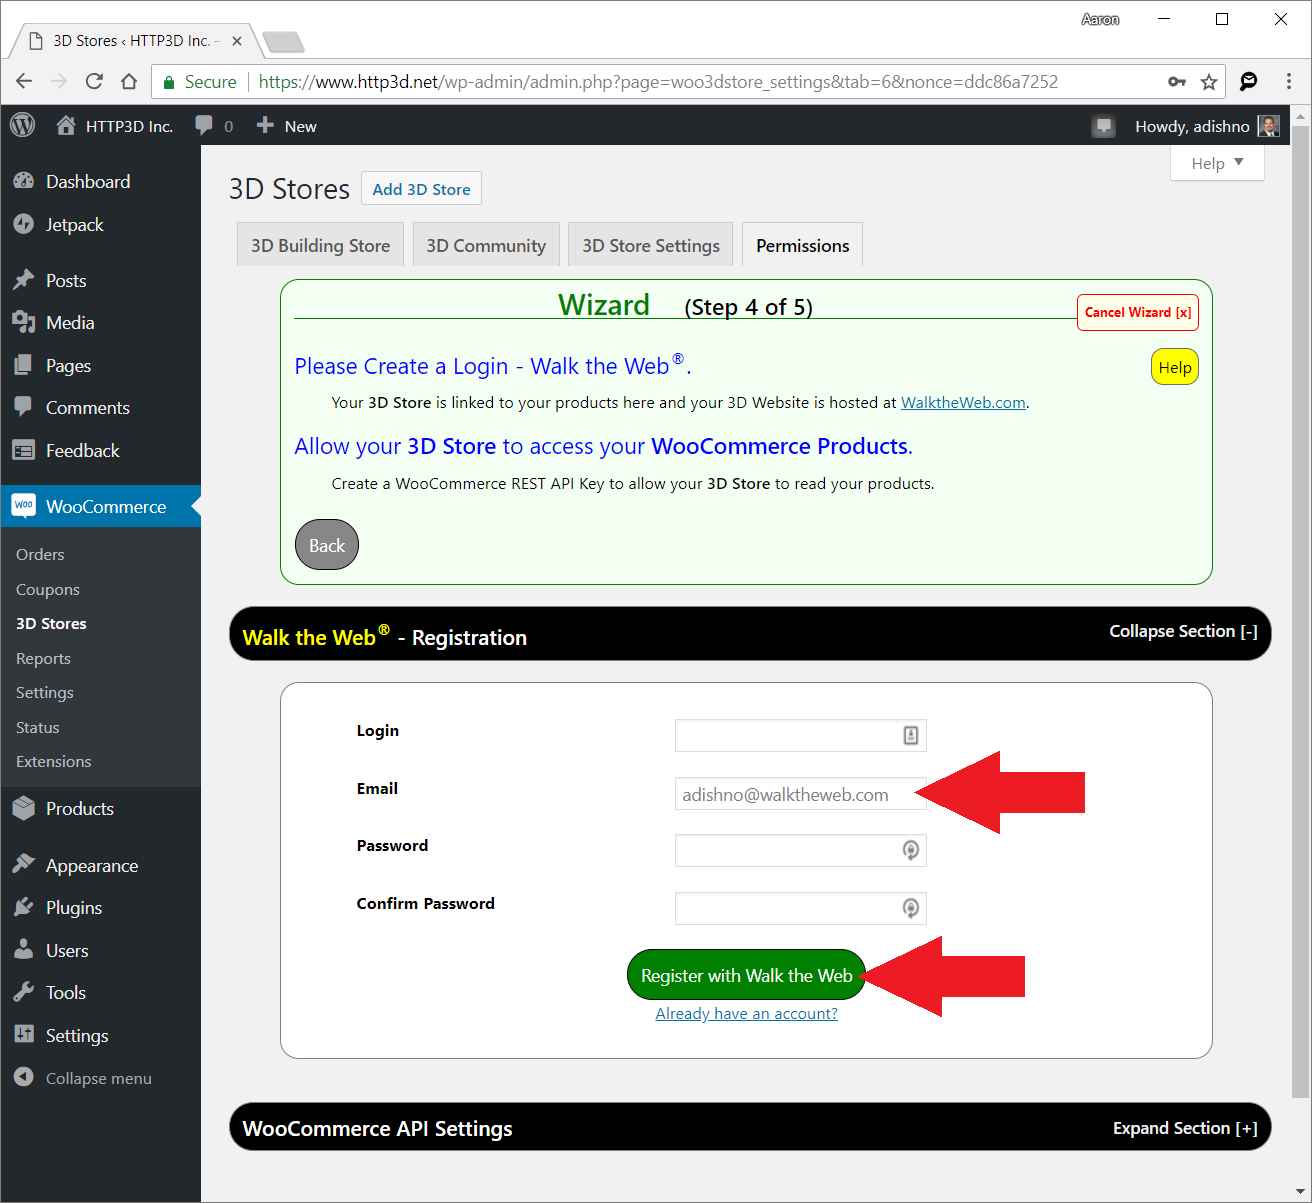
Step 4 – Permissions
There are two parts to the permissions; Walk the Web user account and WooCommerce API access. Once they are set, you can create additional stores and they will share the same settings; you only have to do them once!
Walk the Web® User Account
The WooCommerce – 3D Store plugin is installed on your traditional WordPress website to assist with 3D Website creation, settings, and connecting products, but your 3D Store website will be hosted on Walk the Web® servers.
Following these steps, you will have an opportunity for optional paid personalization (like using your own domain name) and service plans, but this tier will always remain free.
If you already have a Walk the Web® user account, click the link under the Register button to see the login option.
The Login must be unique for Walk the Web®. When you select the Register button the system will let you know if it is a duplicate.
The Email address will be automatically read from your WordPress website login.
The Password should be a mix of letters (a-z and A-Z), numbers (0-9), and keyboard symbols (!@#$%^&*,.:;).
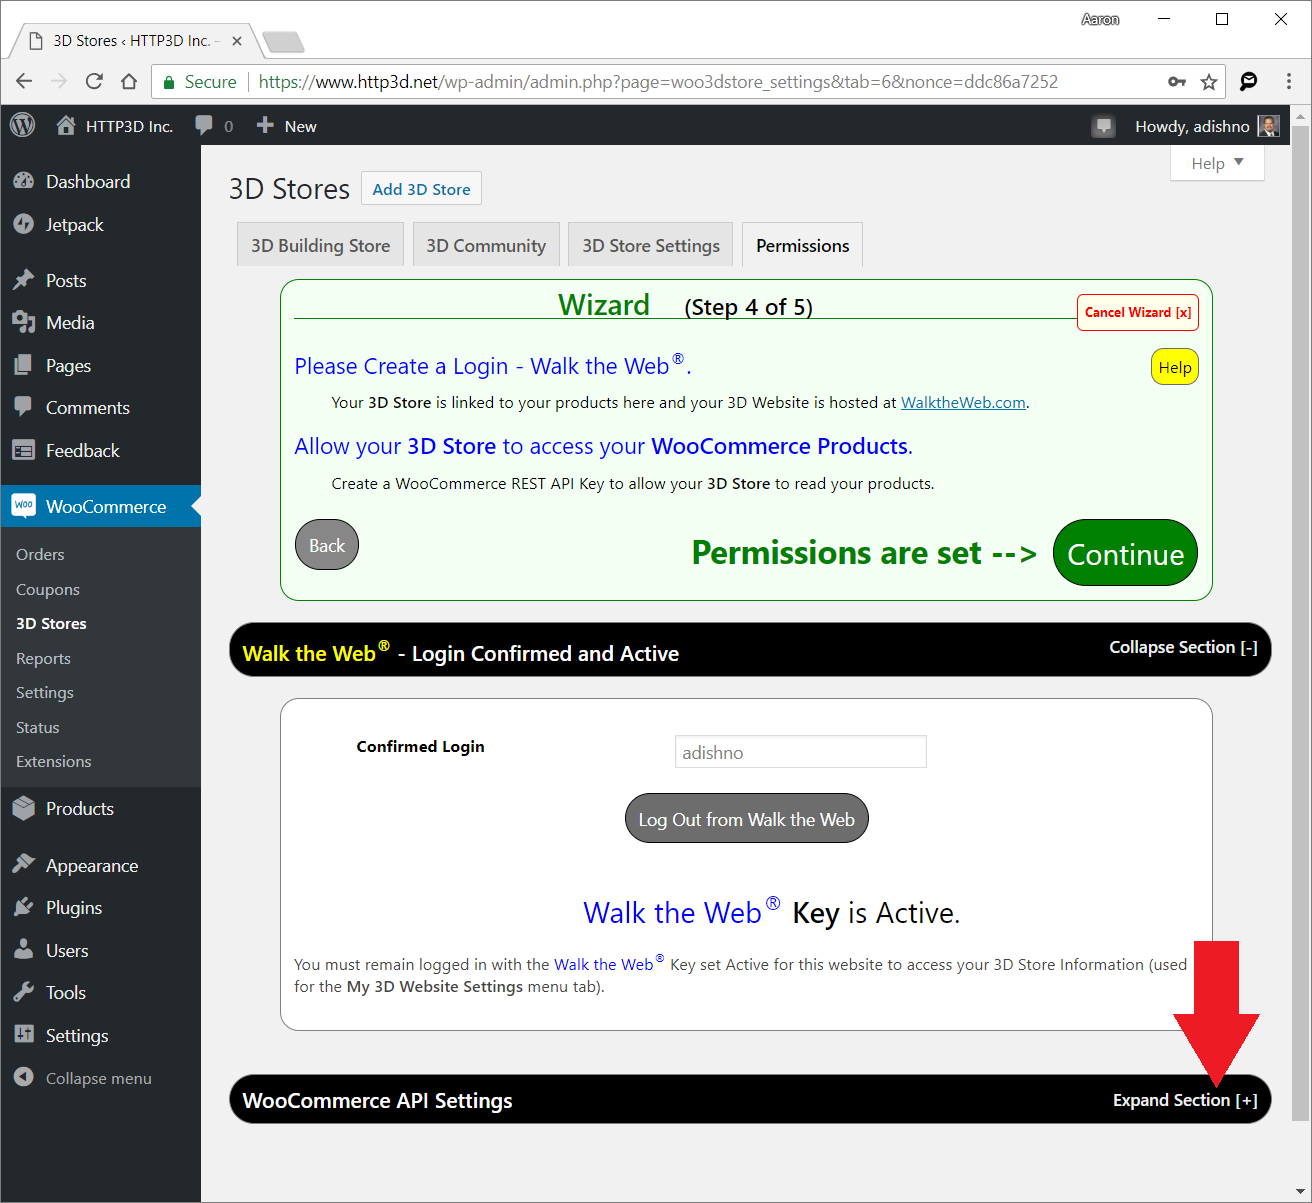
WooCommerce API Settings
After you register or login the plugin will automatically assign a WooCommerce API Key.
Click the Expand Section link on the right of that section to edit or confirm or edit the settings.
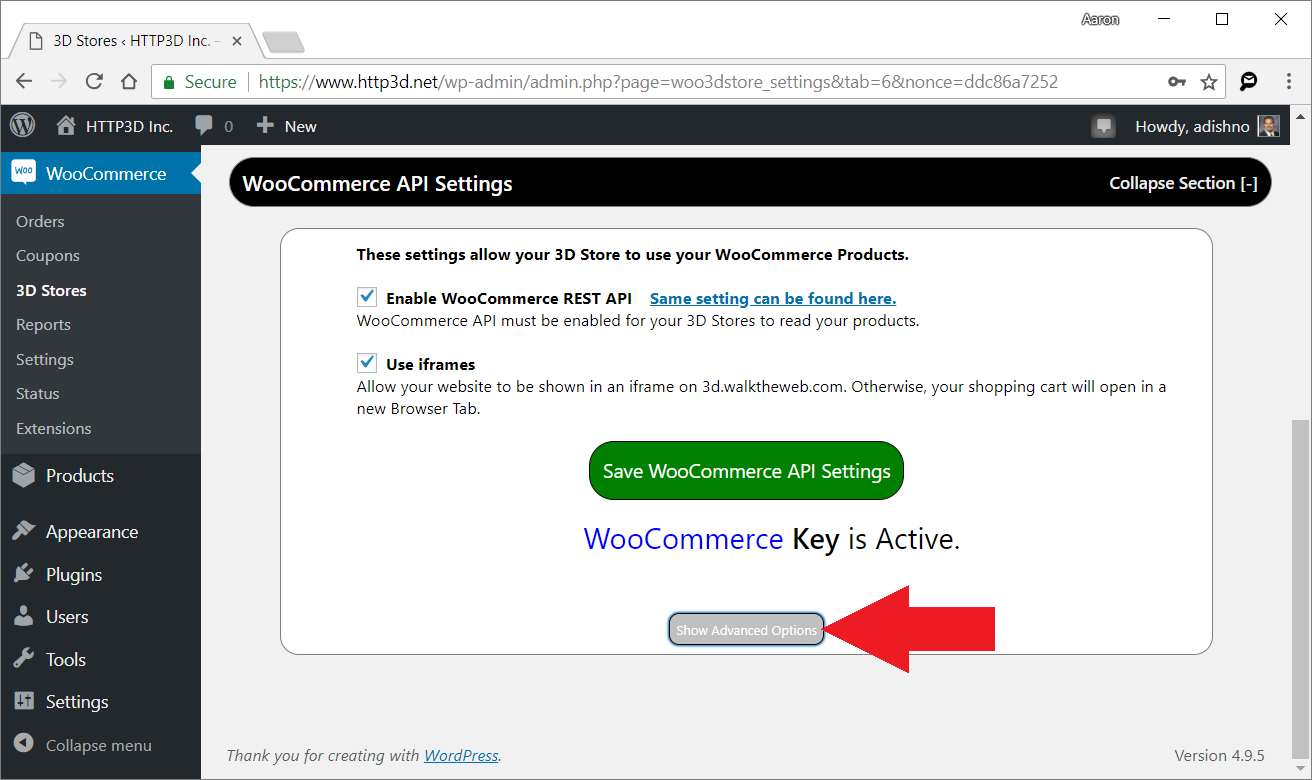
Enable WooCommerce REST API must be checked or the products will not show in your 3D Store.
Use iframes is optional, but preferred by most for a more seamless customer experience.
If not checked, your shopping cart and product descriptions will open in a new browser tab.
Click the Show Advanced Options link
The top section (1.) Advanced Options allows you to manually set the WooCommerce API Key if necessary. Change the values then click Save WooCommerce API Settings.
The bottom section (2.) Advanced Options allows you to customize the URL settings for your products and shopping cart pages. Use the test buttons to confirm.
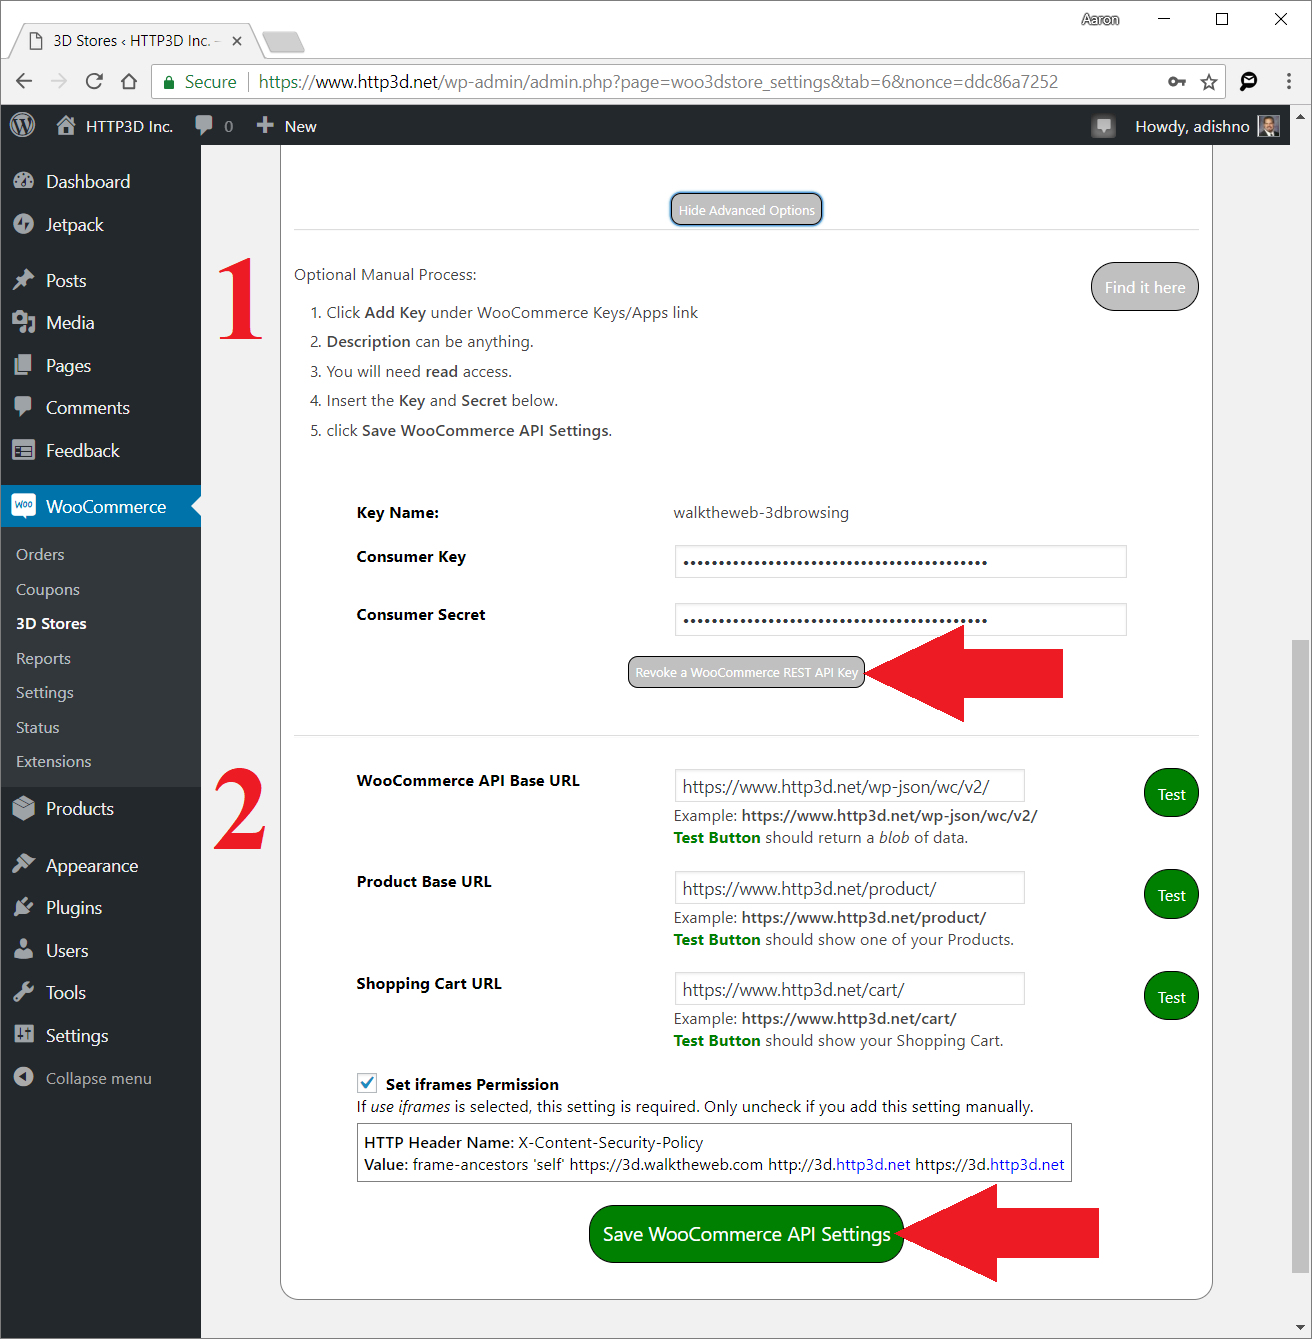
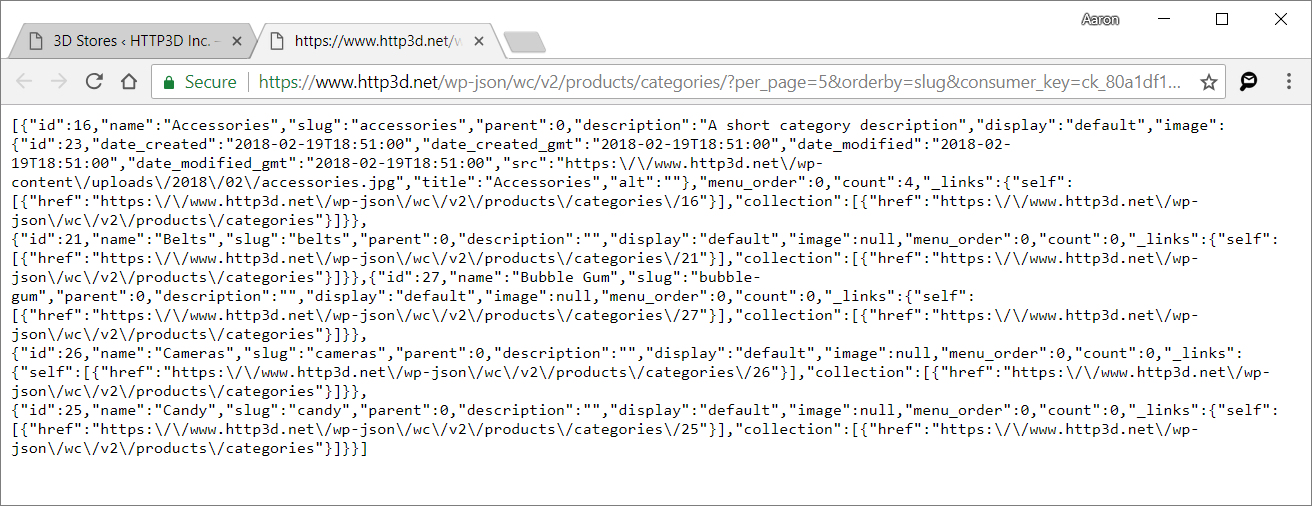
WooCommerce API Base URL Test button should show something like this:
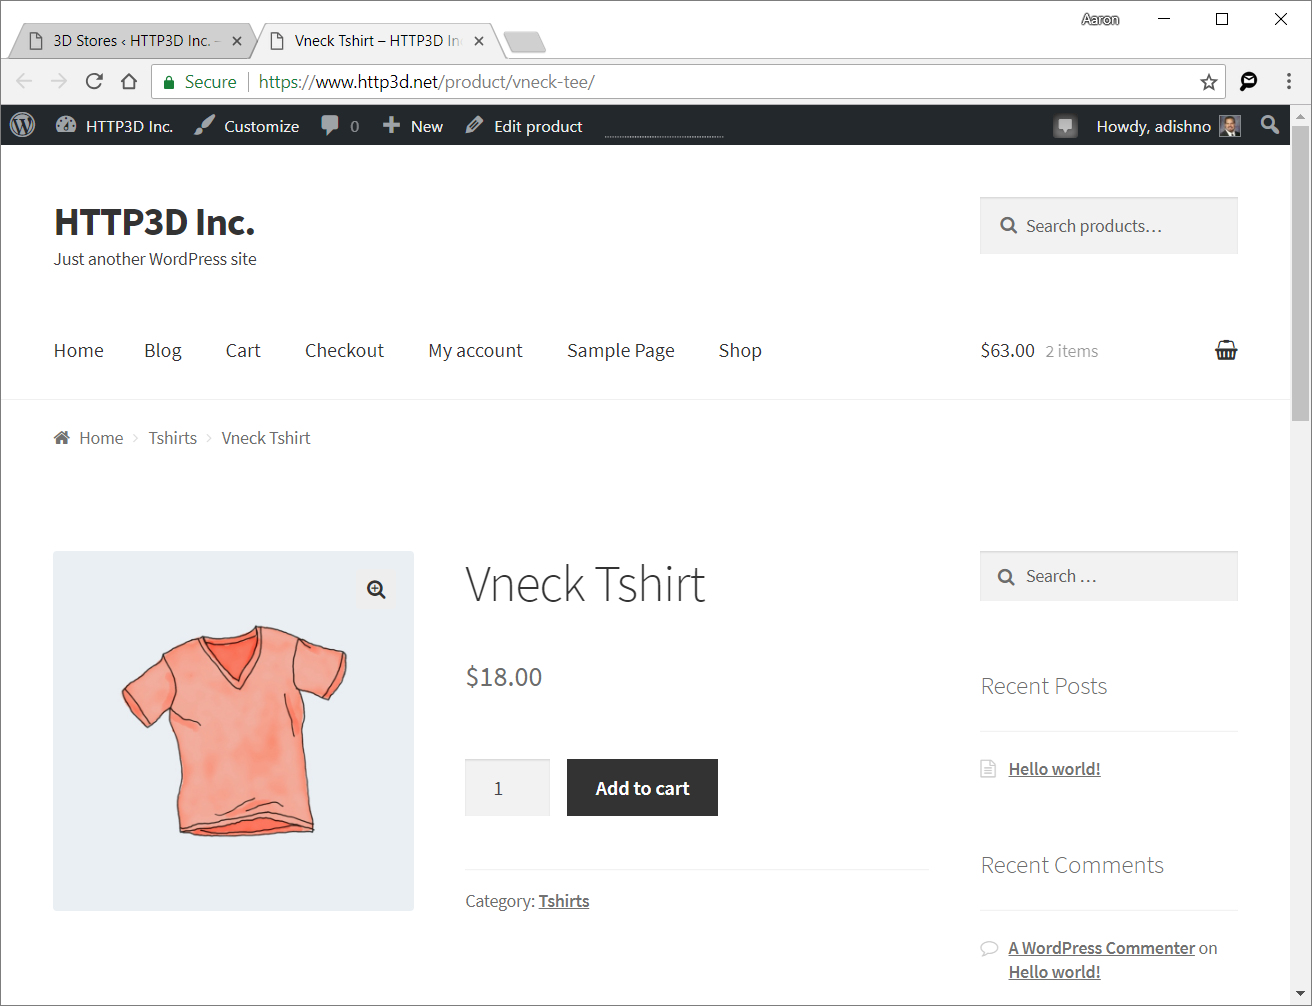
Product Base URL Test button should show one of your products on your website.
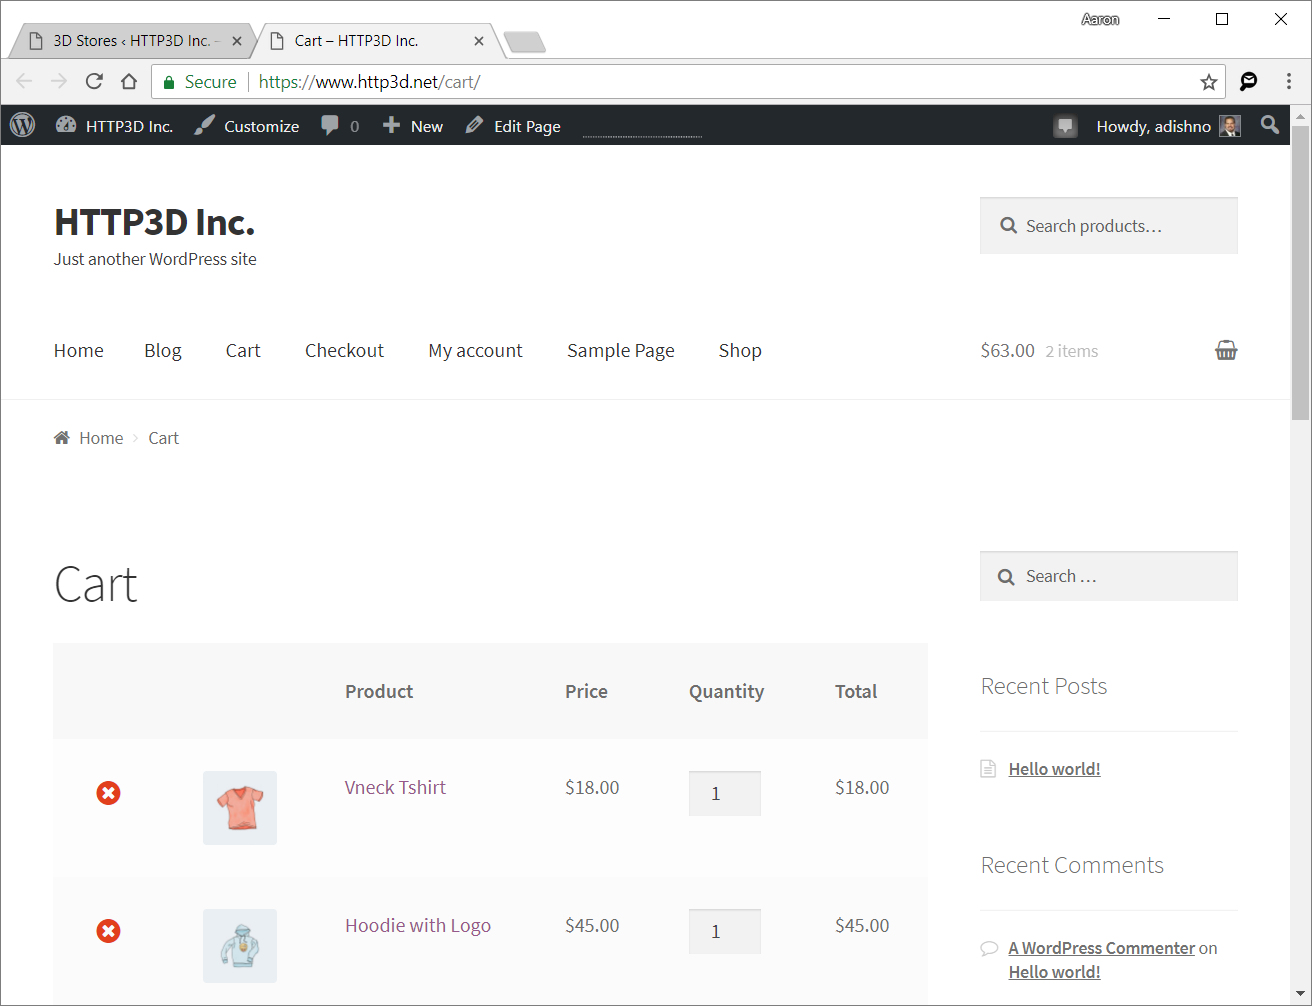
Shopping Cart URL Test button should show your Shopping Cart page on your website.
Adjust the URLs as needed for your website (if the default URLs didn’t work).
Click Save WooCommerce API Settings then the Continue button on the Wizard panel to continue.
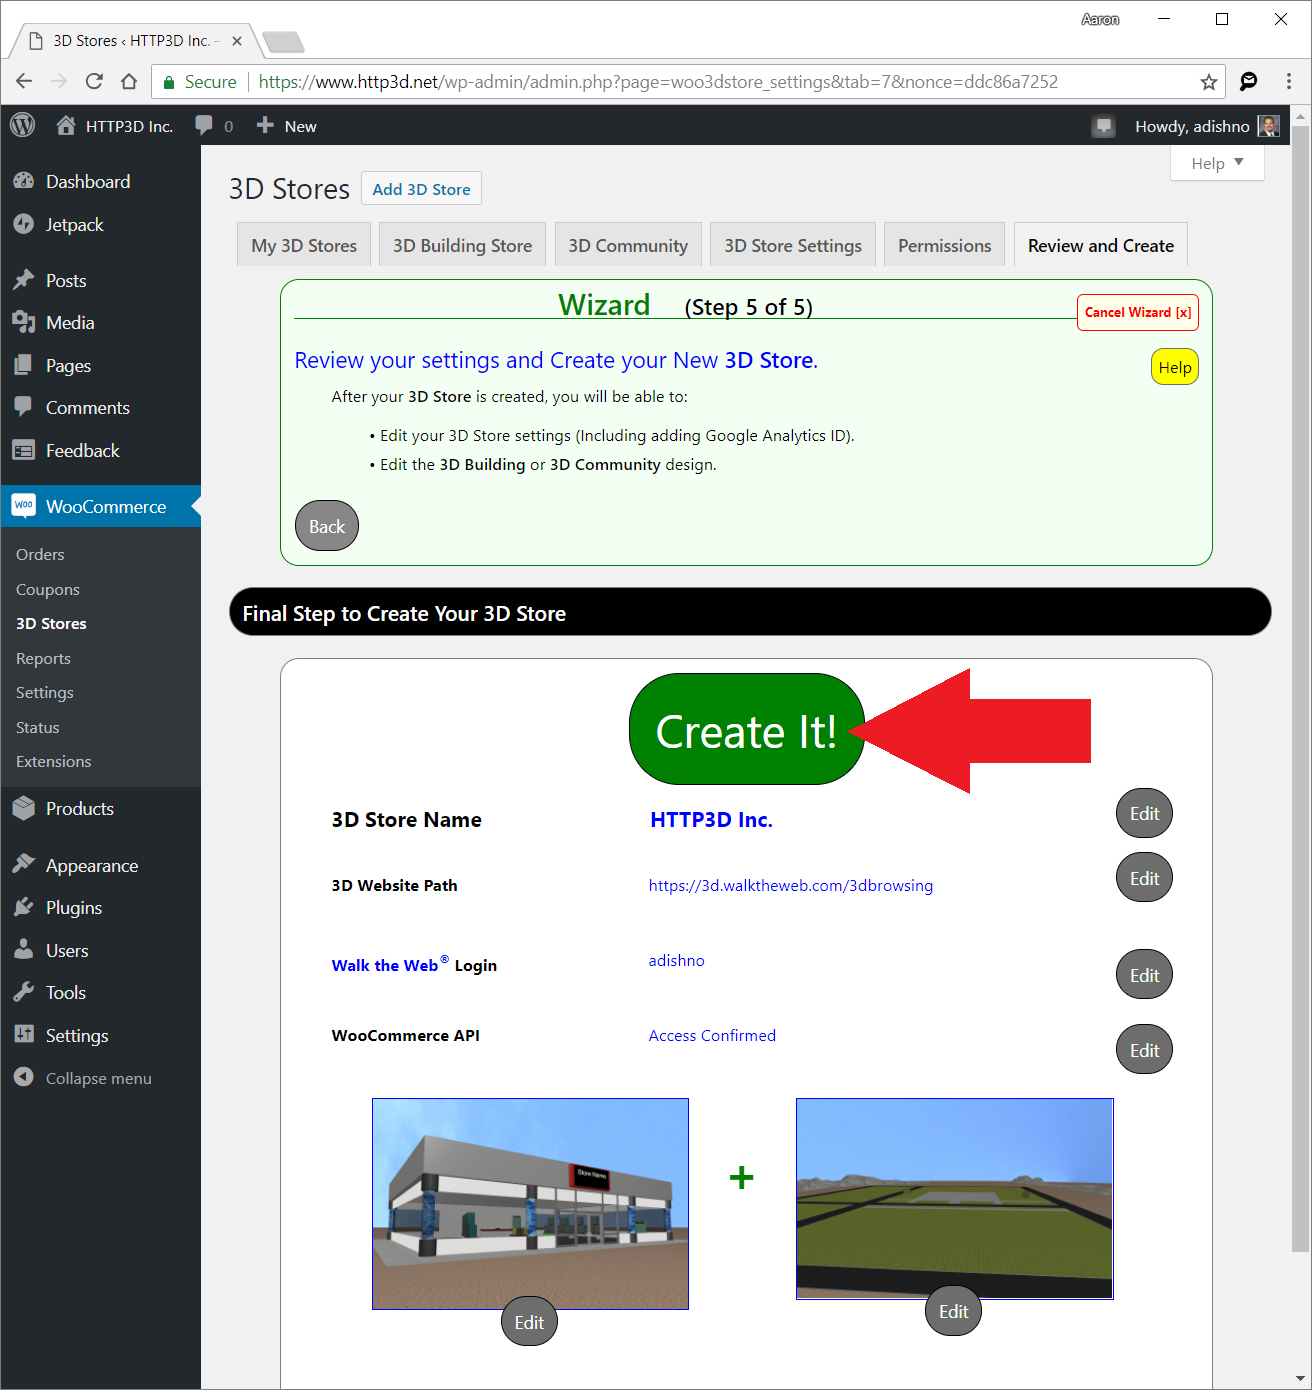
Step 5 – Create your 3D Store
Review your settings. You can click Edit next to any of the setting to change it.
When you are ready, click Create It!
If the Create It button does not show, then visit the section requiring attention.
You must have a 3D Store Name, available 3D Site Path, Walk the Web login, confirmed WooCommerce API Access, 3D Building and 3D Community selected.
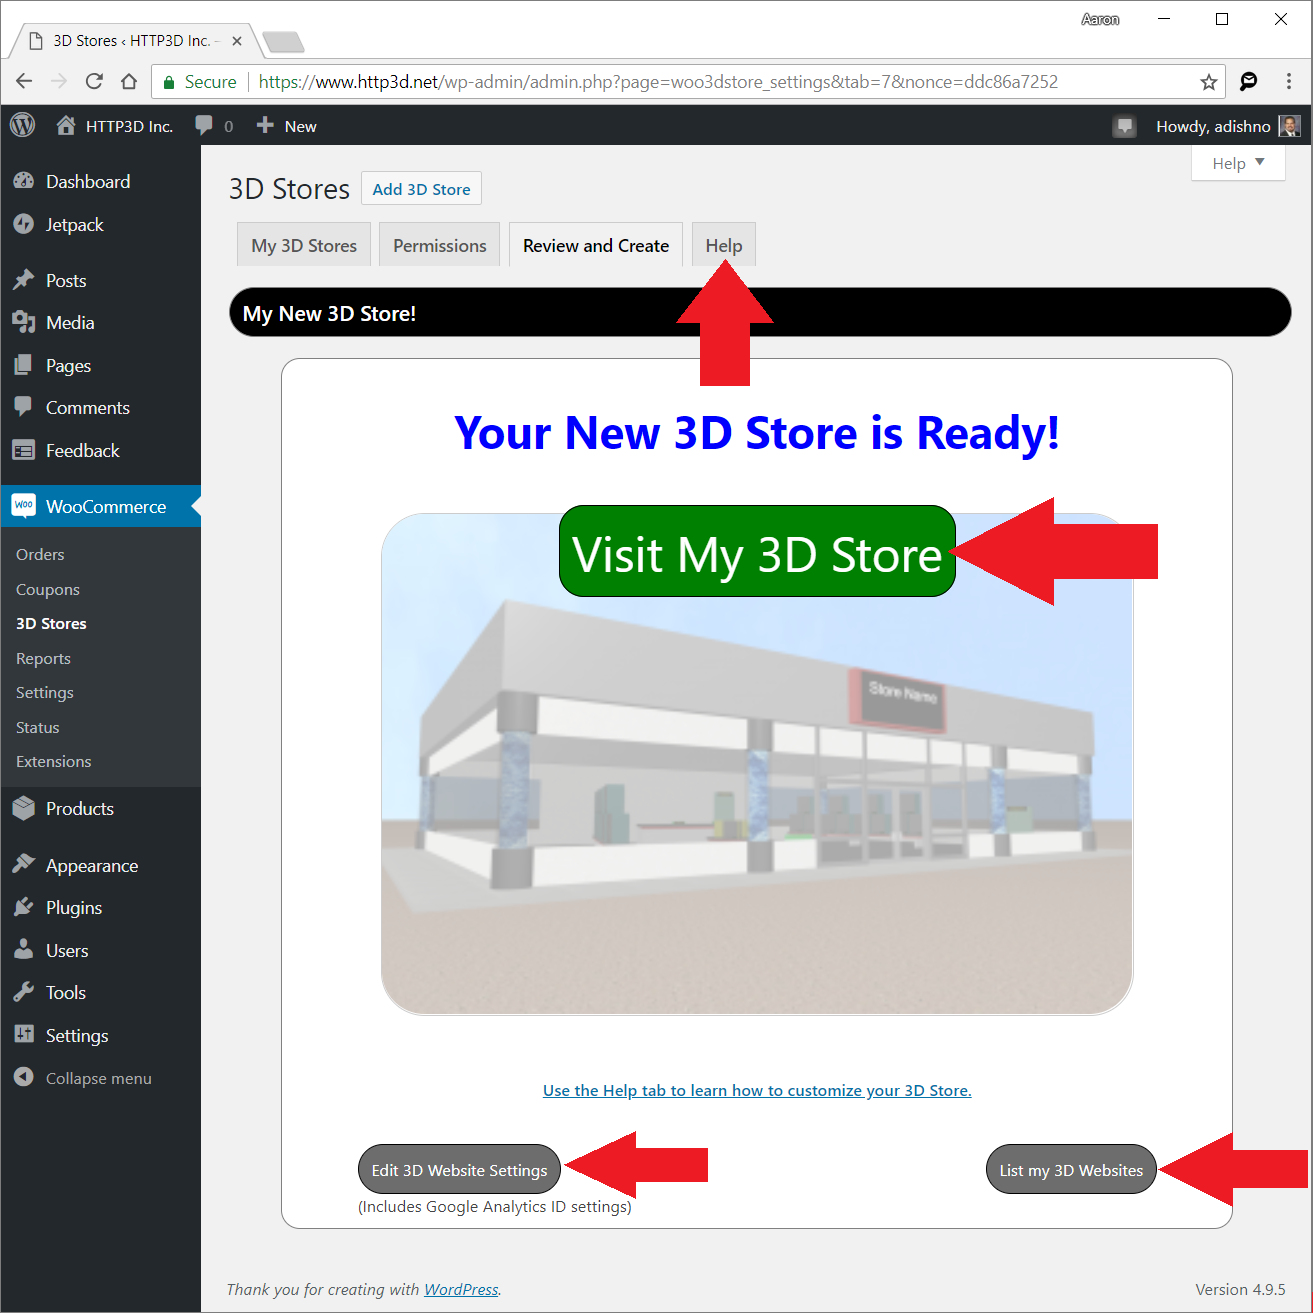
Next you will see the Processing Screen. Give it time, it has a lot to create!

Your New 3D Store is Ready!
Visit My 3D Store button will open the 3D Store URL you chose during the setup.
A couple things to note:
- List My 3D Websites tab – will show a list of your created 3D Stores with links to edit the settings. The List My 3D Websites button shows the same as the My 3D Sites tab.
- Edit 3D Website Settings tab will let you edit the settings of this newly created 3D Store including adding Google Analytics ID to your 3D Store Building and 3D Community.
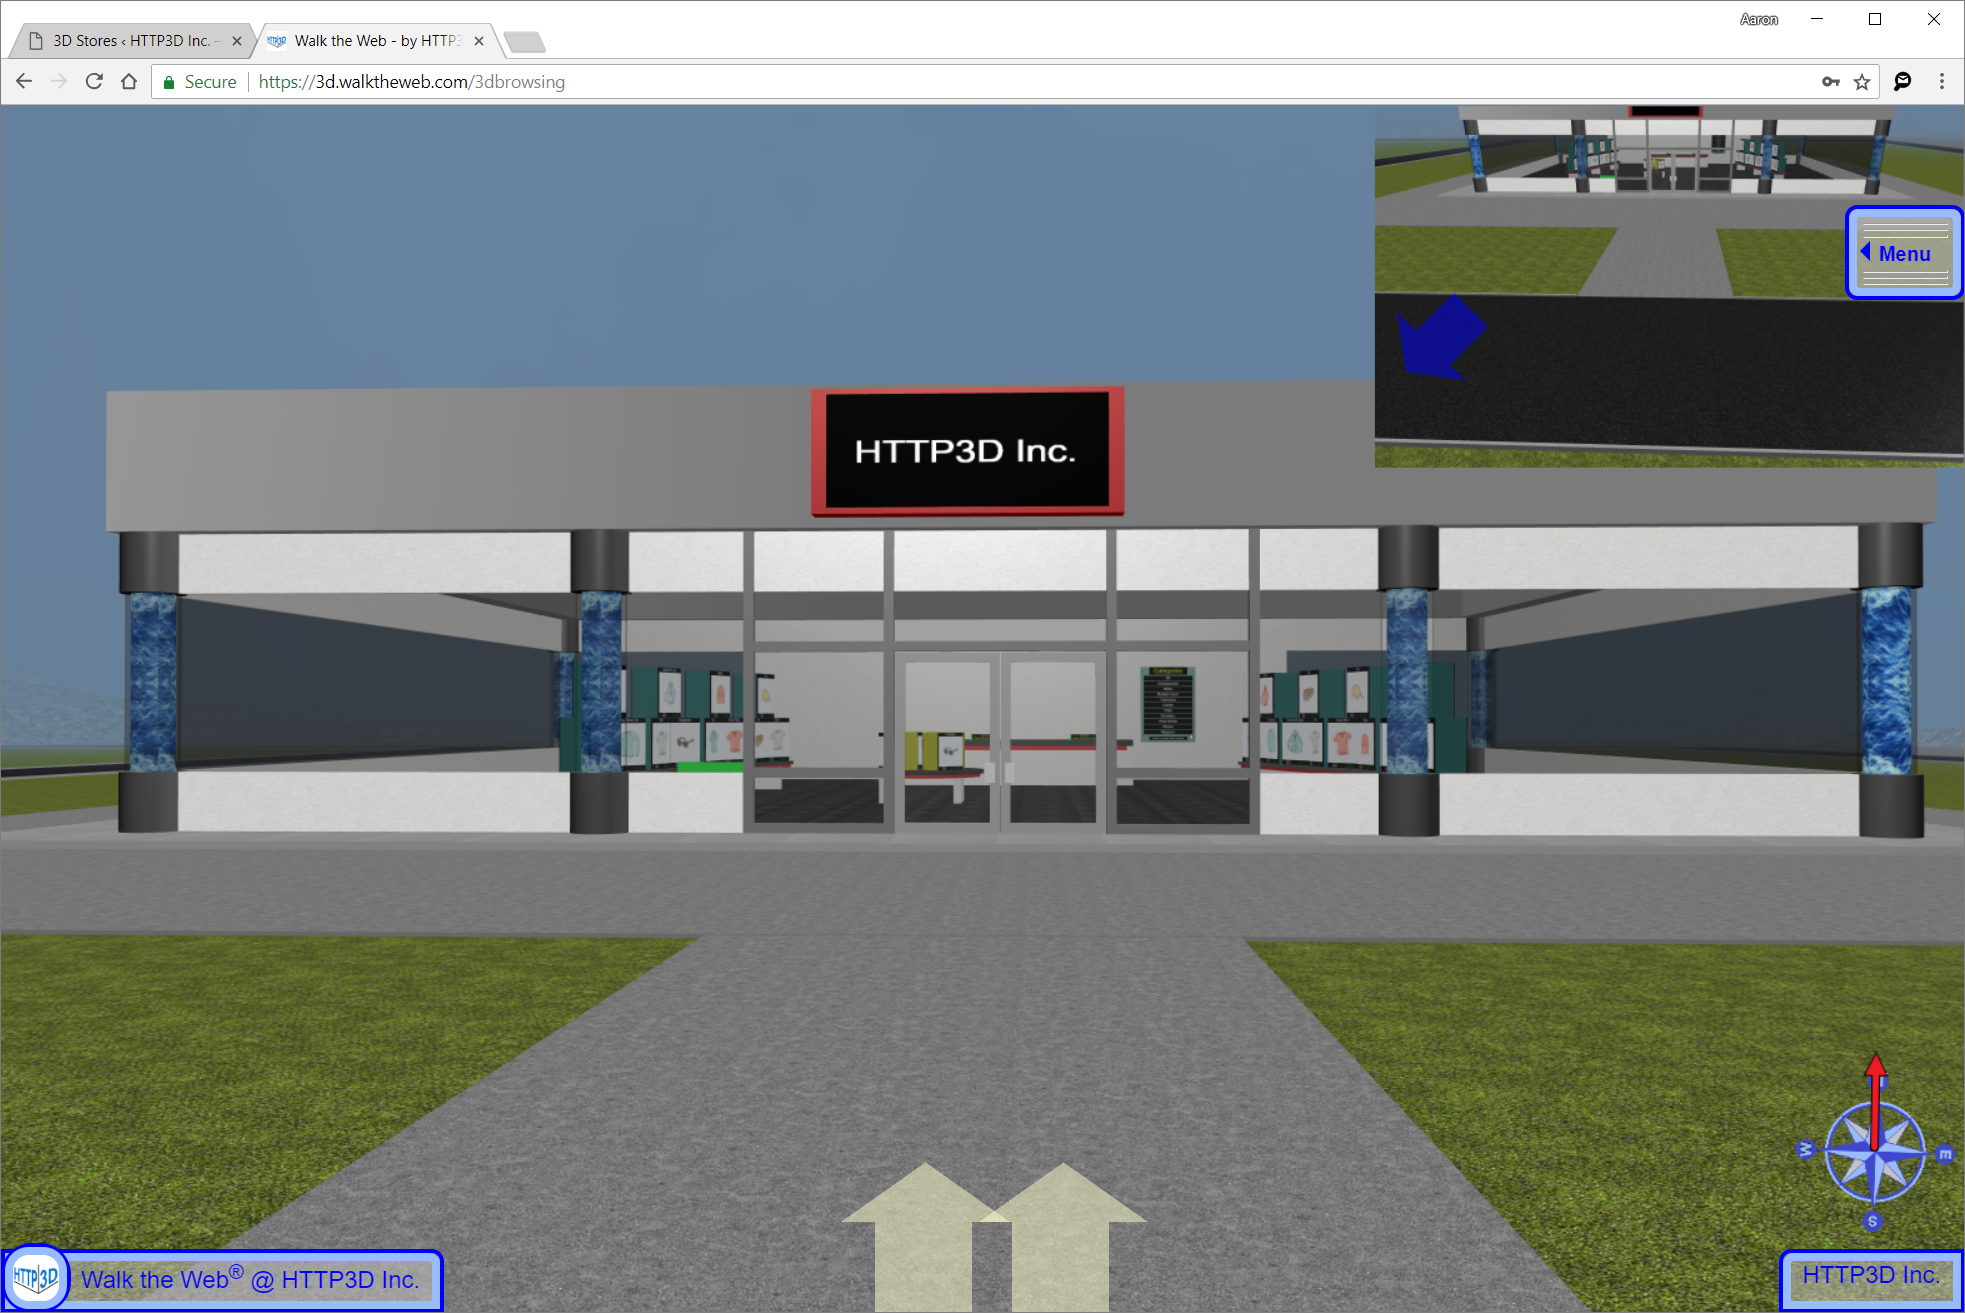
Enjoy 3D Browsing!
For more information about 3D Browsing or customizing your 3D Store, check out our Knowledge base and Tutorials.
Here are some helpful links: