- /
- /
- /
- /
- /
Custom Domain Name DNS Setup
By Aaron Dishno Ed.D.
Now that you have decided to personalize your 3D Community with a custom domain name like:
http://3d.YourDomainName.com
It is time to set up Domain Name Services (DNS) to get it routed to the Walk the Web® servers.
Technically, we need to add a C-Name in DNS to point the 3d traffic to 3d.walktheweb.com.
 Aren’t you glad I started with the non-technical version? I promise to make it painless. In this demo I am using GoDaddy DNS, but it will be pretty much the same in other services.
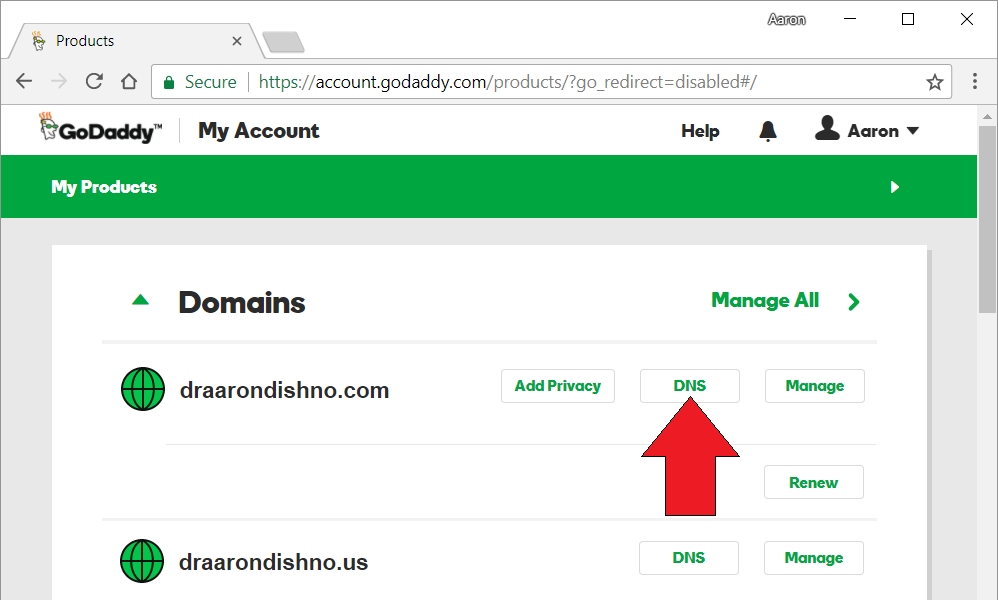
Open GoDaddy and Login. On the menu under your name in the top right corner, select My Products and expand the Domains section.
On some accounts, there will be 3 dots next to your domain name … when you click it, you will see the link to DNS… and other user screens will show the link for DNS next to the domain name. Either way, find the DNS link and click it.

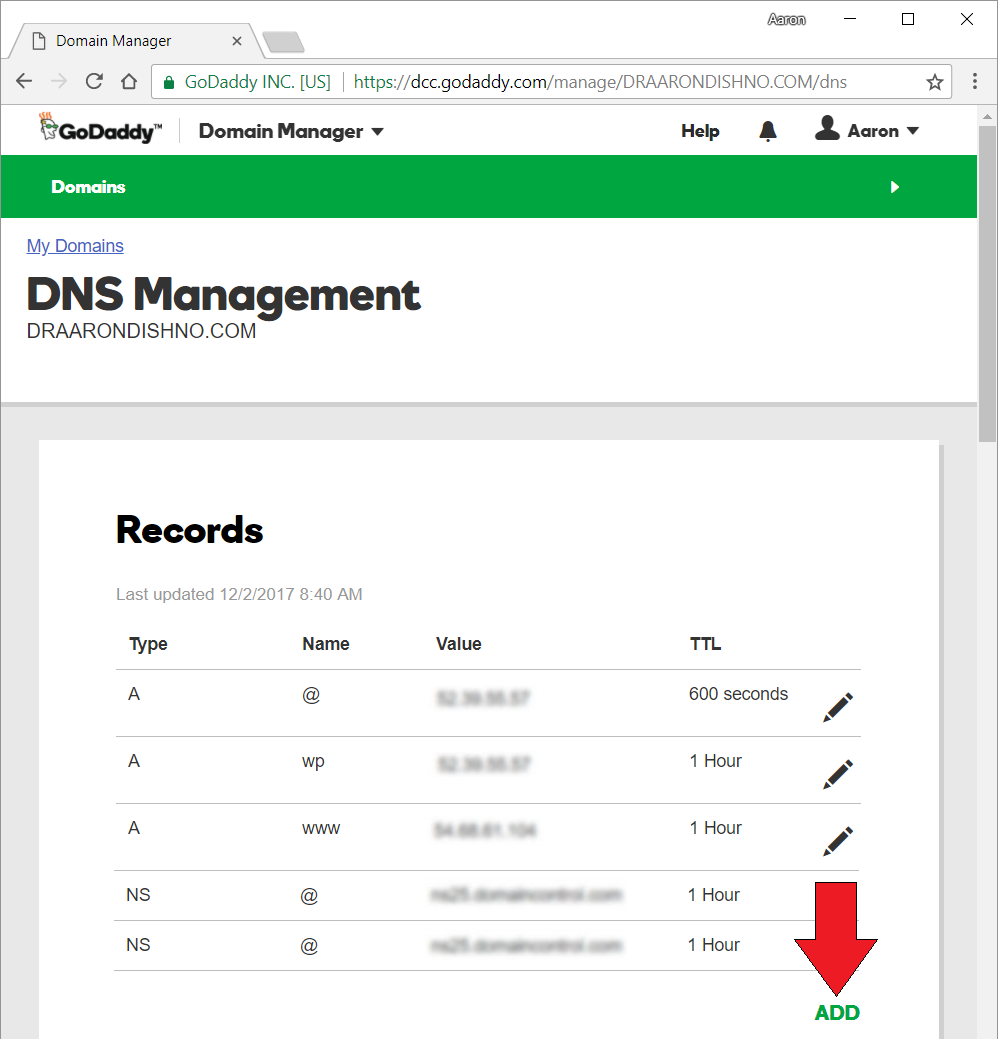
You should now see the list of DNS entries for your domain name.
Click ADD

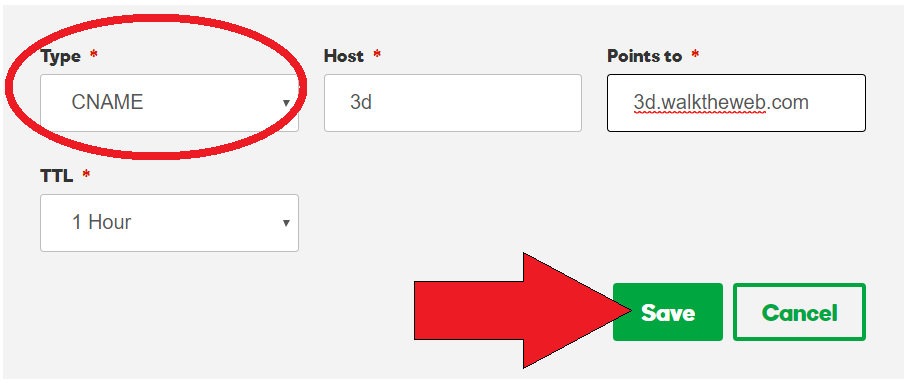
On the form, Select Type -> C-Name
Enter Host as 3d
Set Points to: 3d.walktheweb.com
and click Save
It should look just like this:

Your 3D Community Website should work as the new name:
http://3d.YourDomainName.com
Standard note: DNS is like having a chain of servers throughout the internet. After you make a DNS change it could take as long as 24 hours to fully take affect. (But from my experience, most of the time it works immediately).
If you are seeing the https://3d.walktheweb.com home page instead of your 3D Store or 3D Community, then the DNS is correct, but you need to purchase the Personal Upgrade for just $8 a month, billed yearly.
